
How can we help?
Search for answers or browse our knowledge base
Working with Excel : importing and exporting
This article describes the Excel import and export features as available to users. For the configuration of these features by the developers, see Excel Import: Development Considerations
For some documents, it may be convenient to prepare your data in Excel and then import it into your GT document. This mode of operation is particularly practical if you already have some of the data you are asked to provide in the GT document, and the data you do have is in one or more Excel workbooks.
Note that the Excel export/import functionality :
- Can be blocked by the project developer
- Are restricted to Windows™ and MacOs™ versions of GTAnswer
Export to Excel
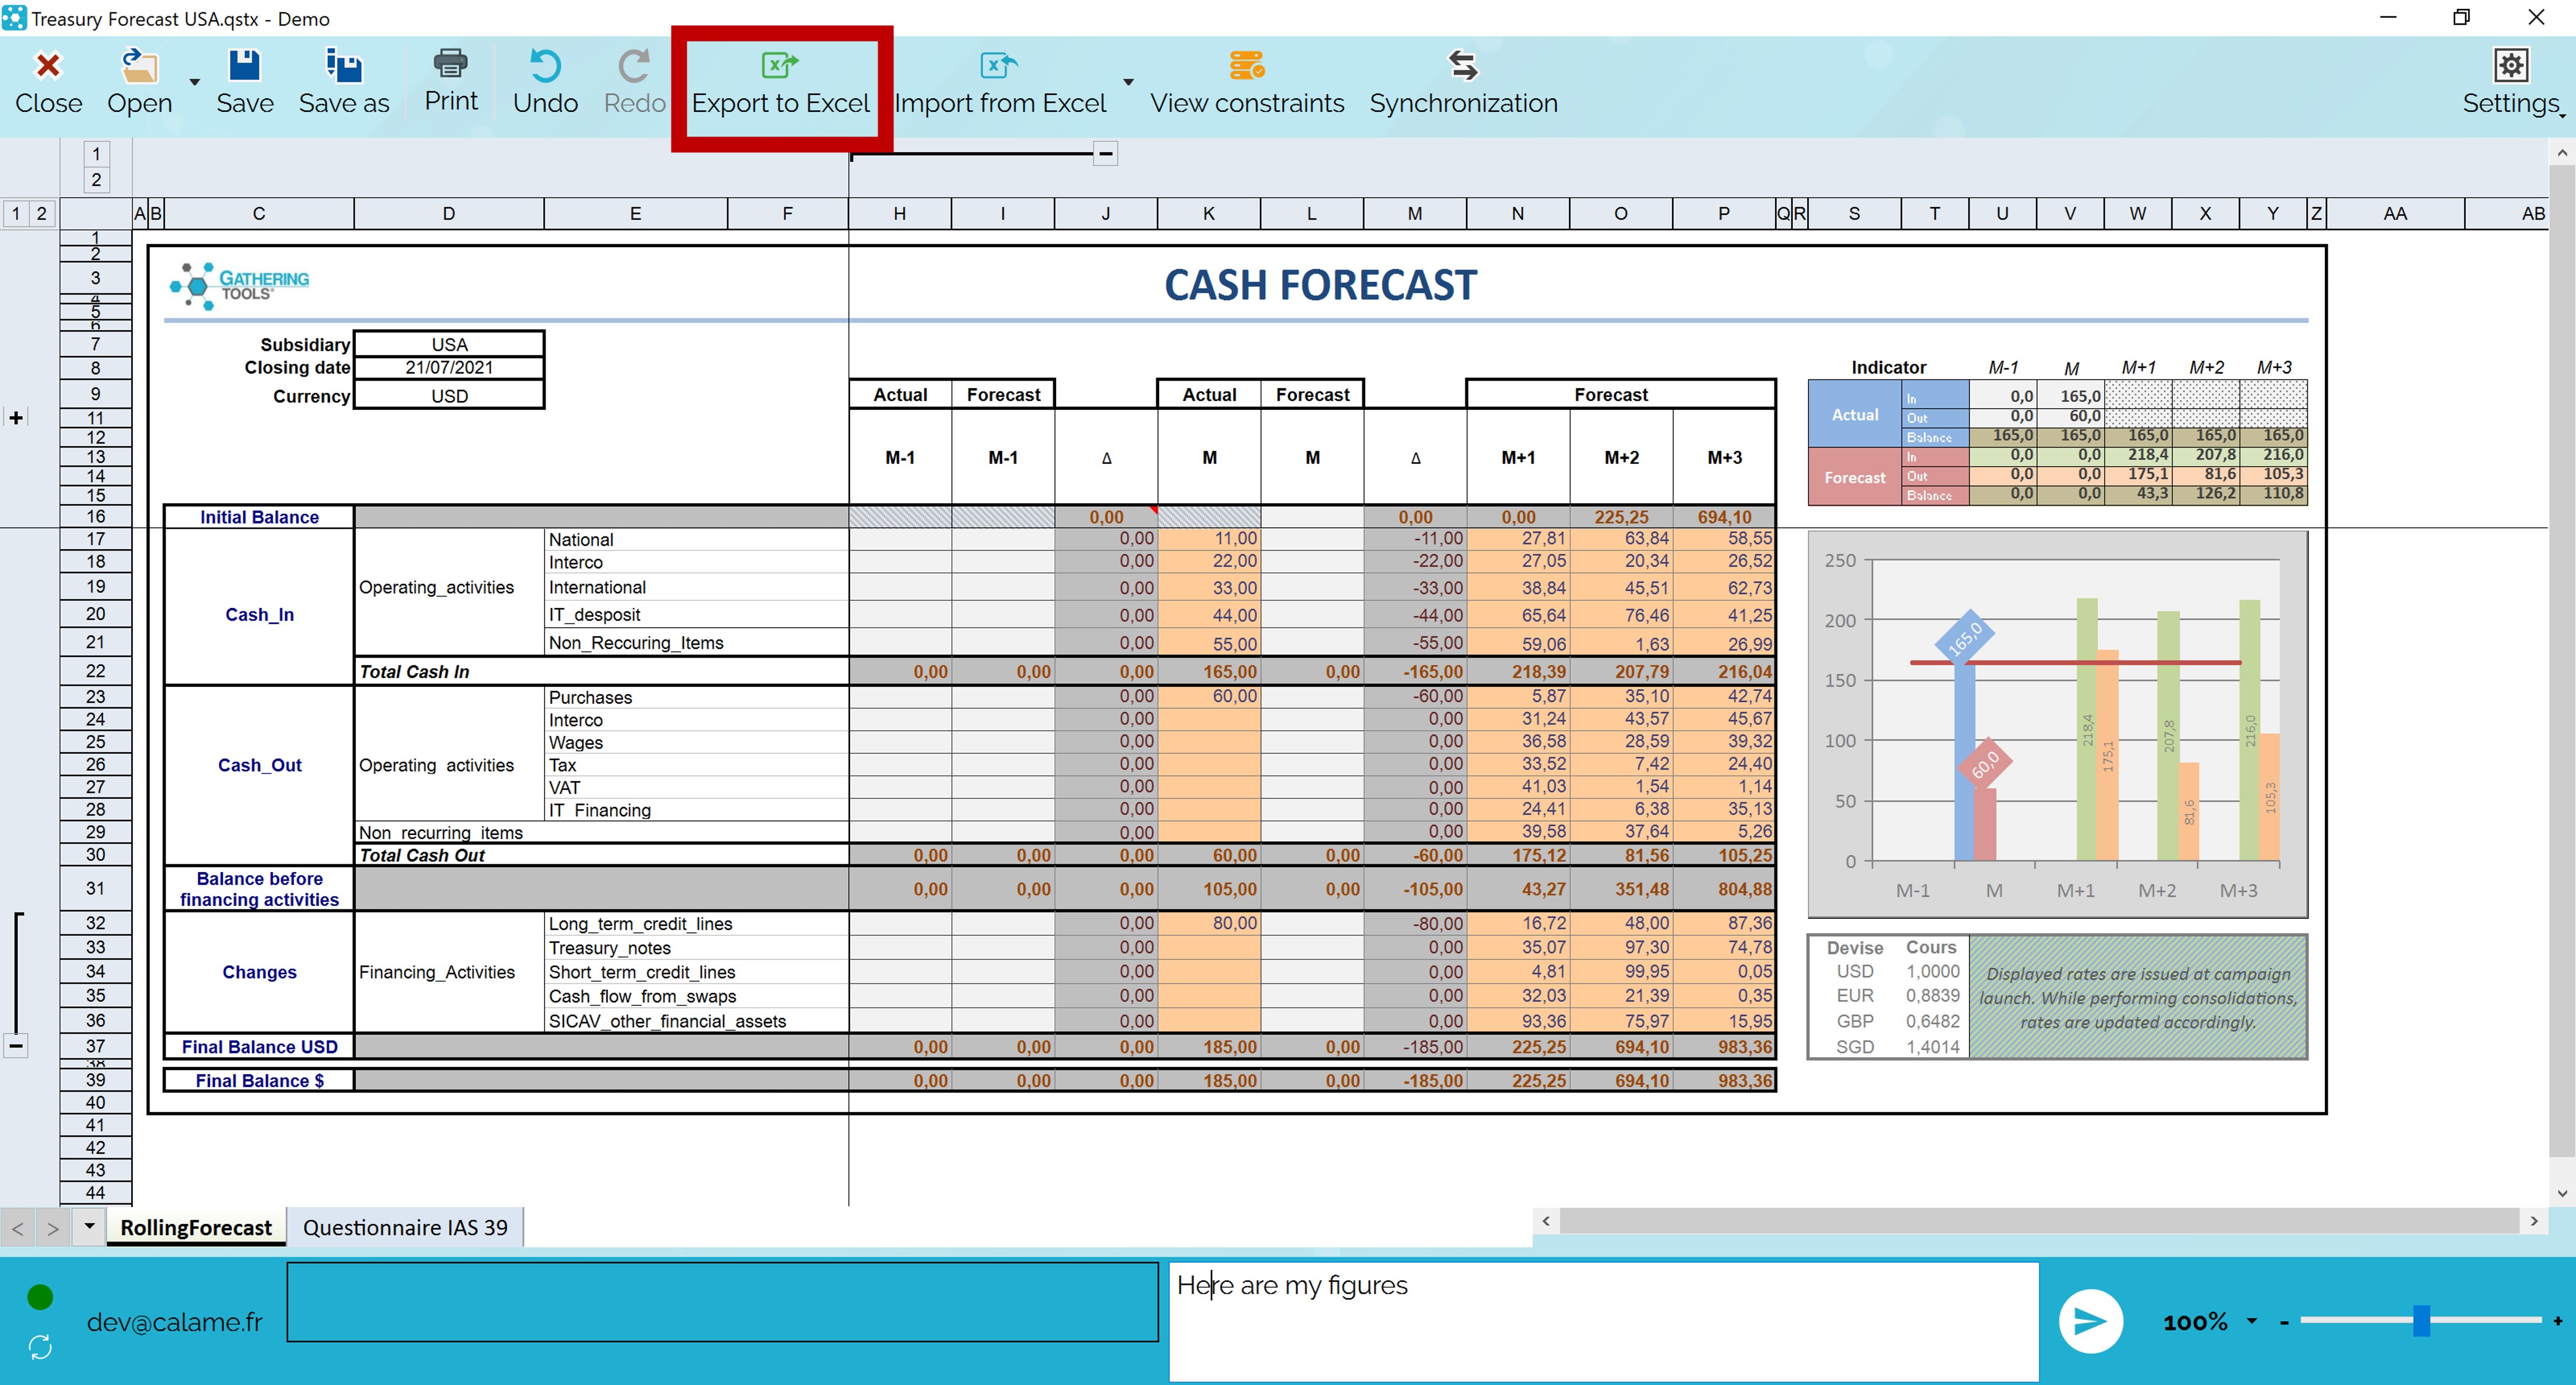
You can export your document to Excel by clicking on the “Export Excel” button.
The application will then make a request for you to save the exported file to the directory of your choice.
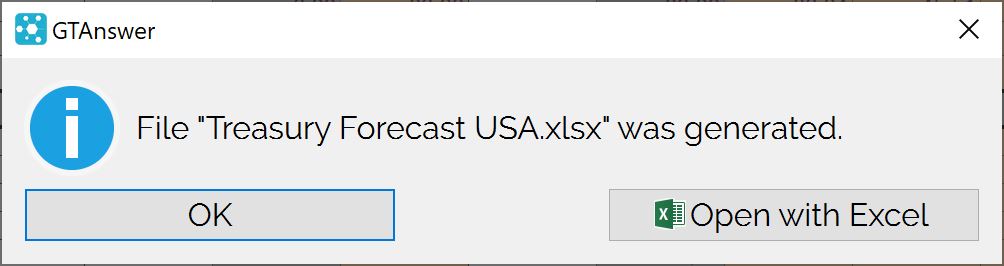
Once the file is exported, a dialog box confirms that the file has been generated.
You can now click on the “Open with Excel” button to start working on the file.
Note: The exported Excel file is sometimes called “Input Matrix”.
Working with the exported Excel file
The exported file has several characteristics that must be taken into account to be able to correctly import your data later.
Preserving named fields
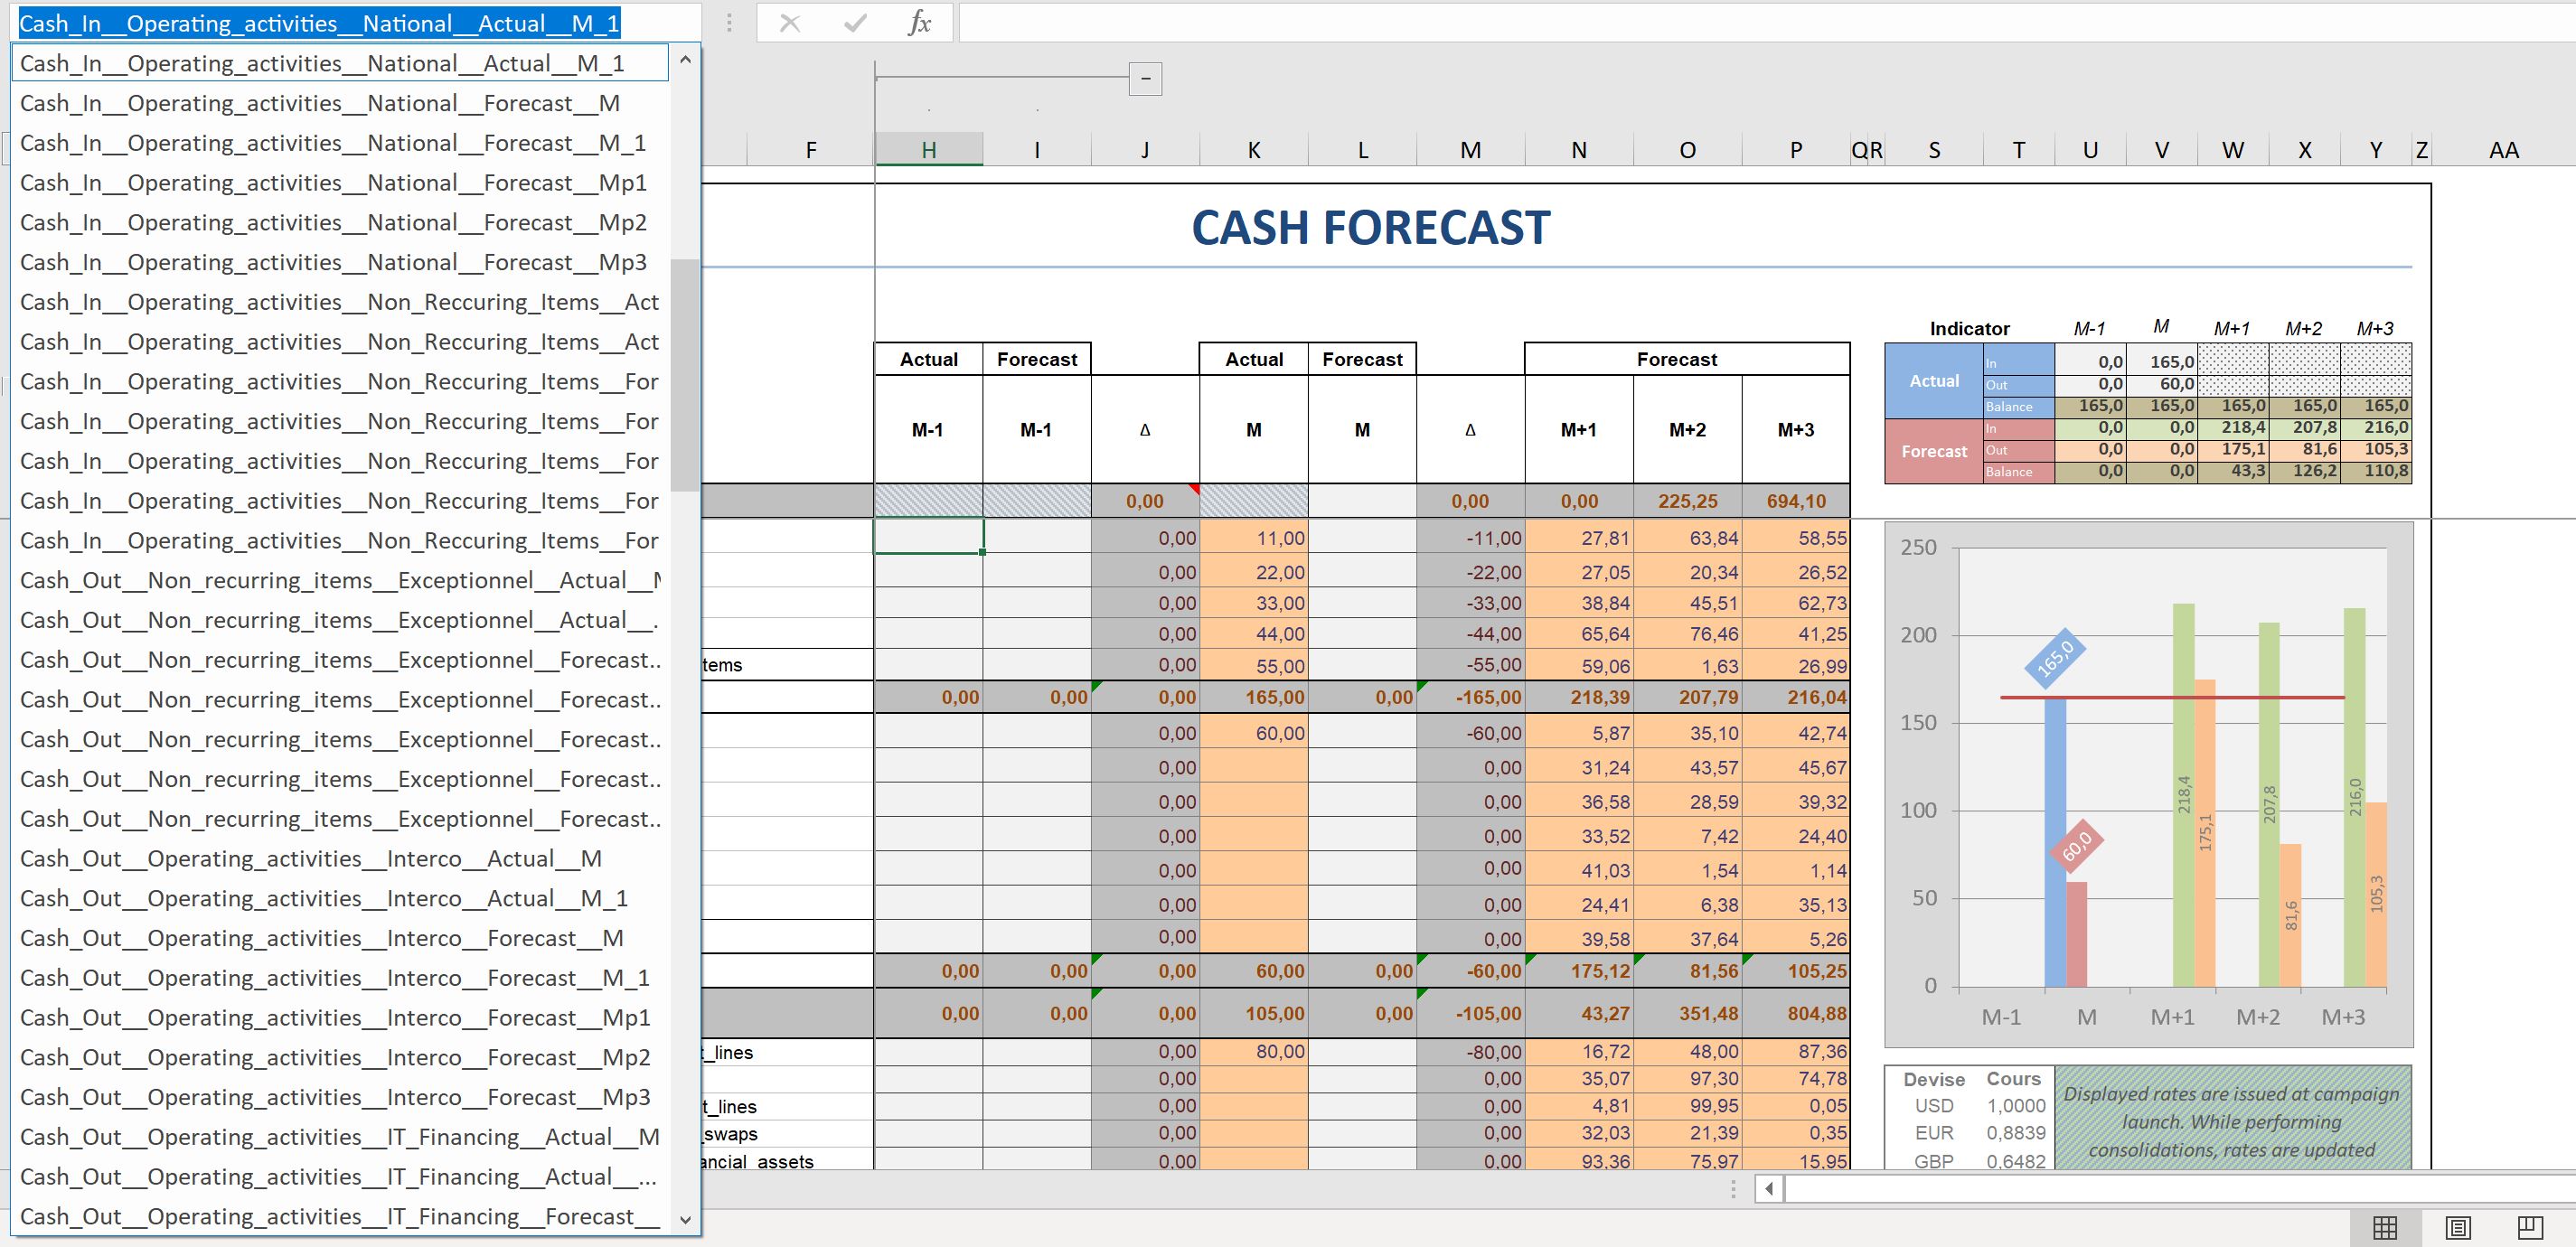
In the exported Excel file, each cell whose value can be imported is given a name.
The file therefore potentially contains a very large number of names that should not be changed.
In fact, when importing, GT will use these names to know which value to import and where to insert it. So if you change or delete some names, the corresponding values will not be imported.
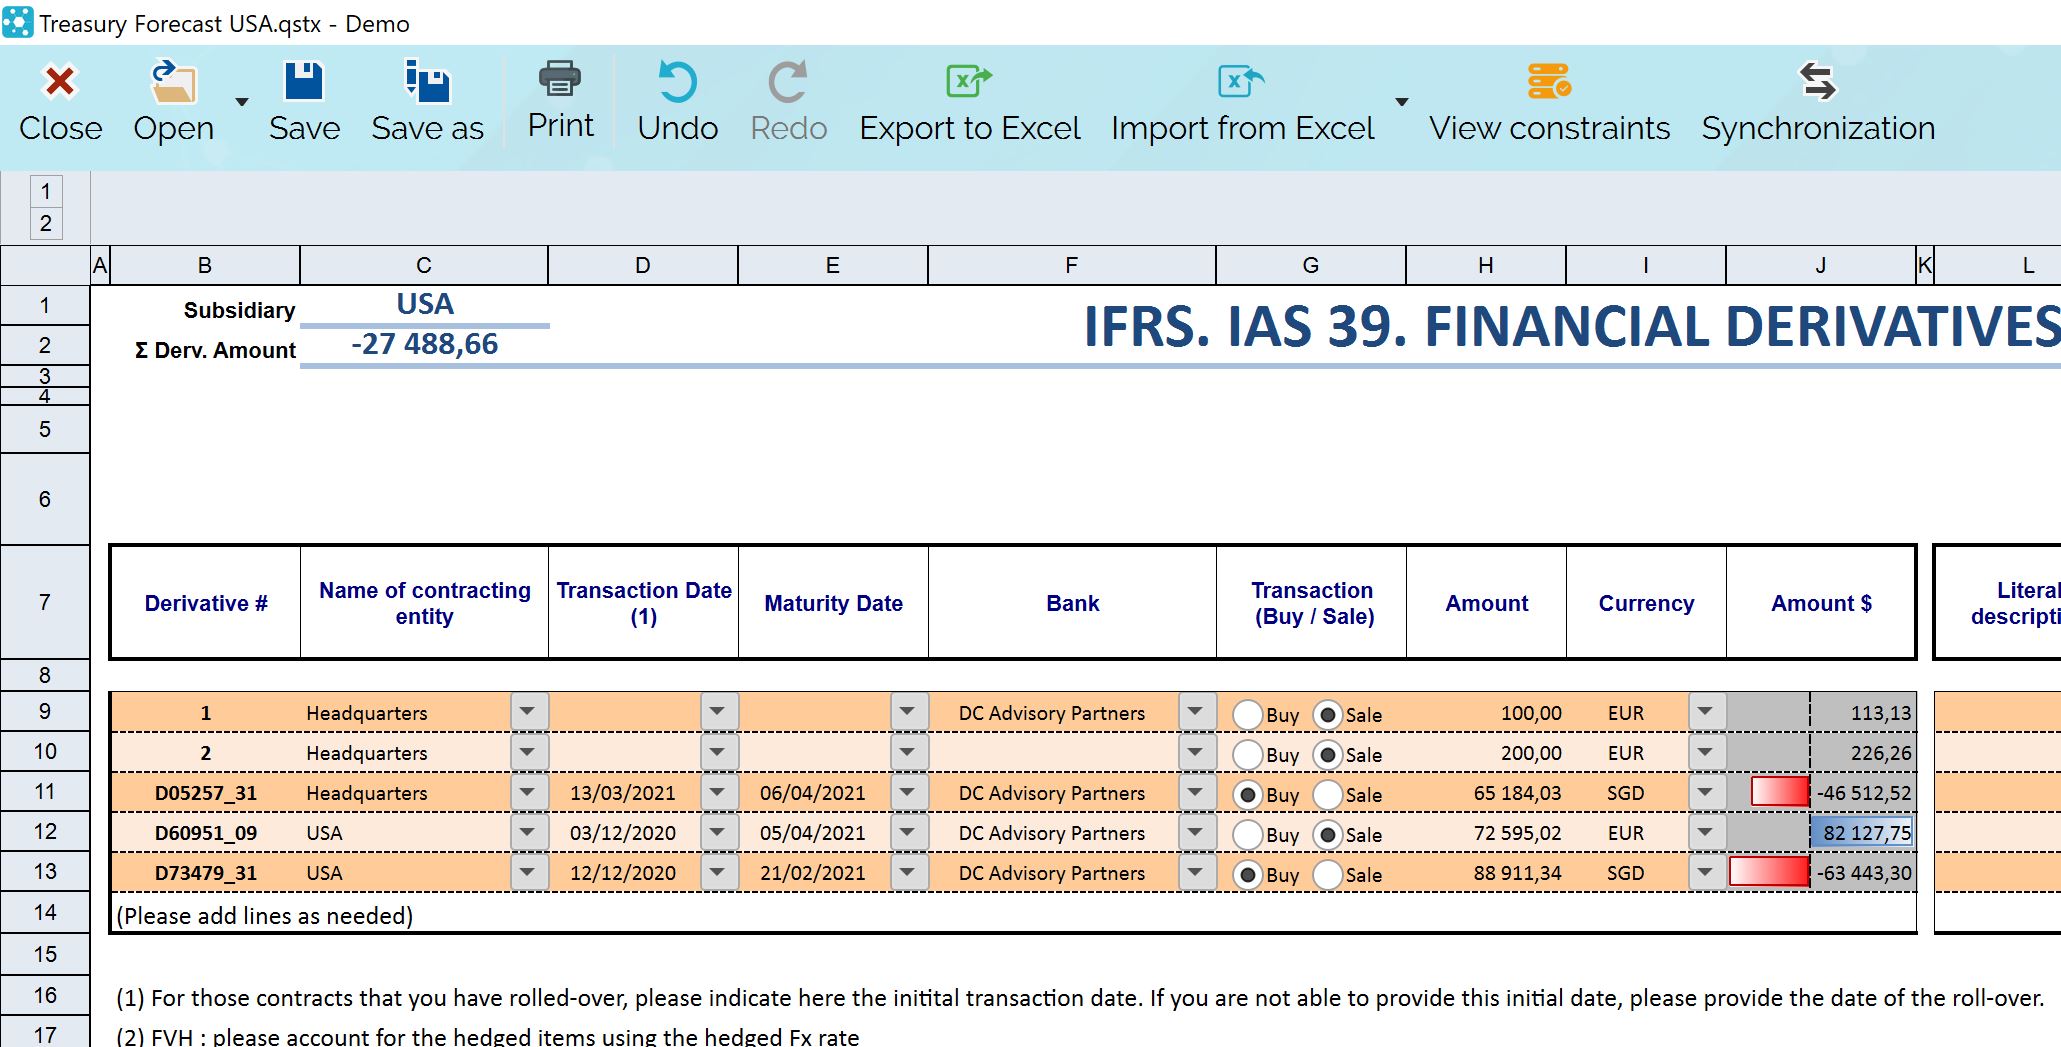
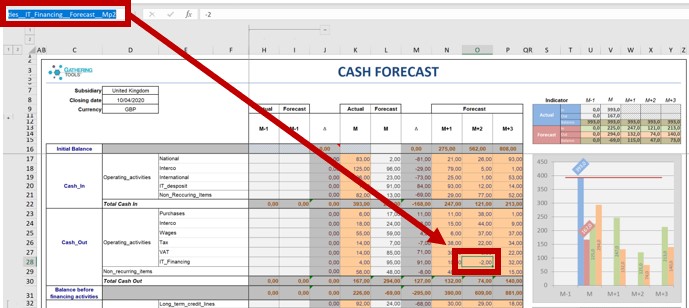
Taking the FOOTER in patterns into account
Patterns are tables in which you can add or delete rows. In the exported Excel file, each pattern has a footer. The footer is an Excel name with the format [Pattern name].FOOTER
The footer is essential for the import of data because it delimits where the import stops for the pattern concerned. In other words, all lines after the footer will not be imported.
Click on the image to display it in full screen

In this example, the footer is located in cell B21 and is called “Derives.FOOTER”.
This means that the imported data from the “Derives” pattern will stop at line 21.
If you want to add rows to the Exported workbook, make sure that you insert them all before the footer, otherwise the rows after the footer will not be imported.
Import from Excel
You can download the Excel questionnaire and input matrix shown below.
To import the values you have entered in the exported Excel file, first make sure you have saved the file.
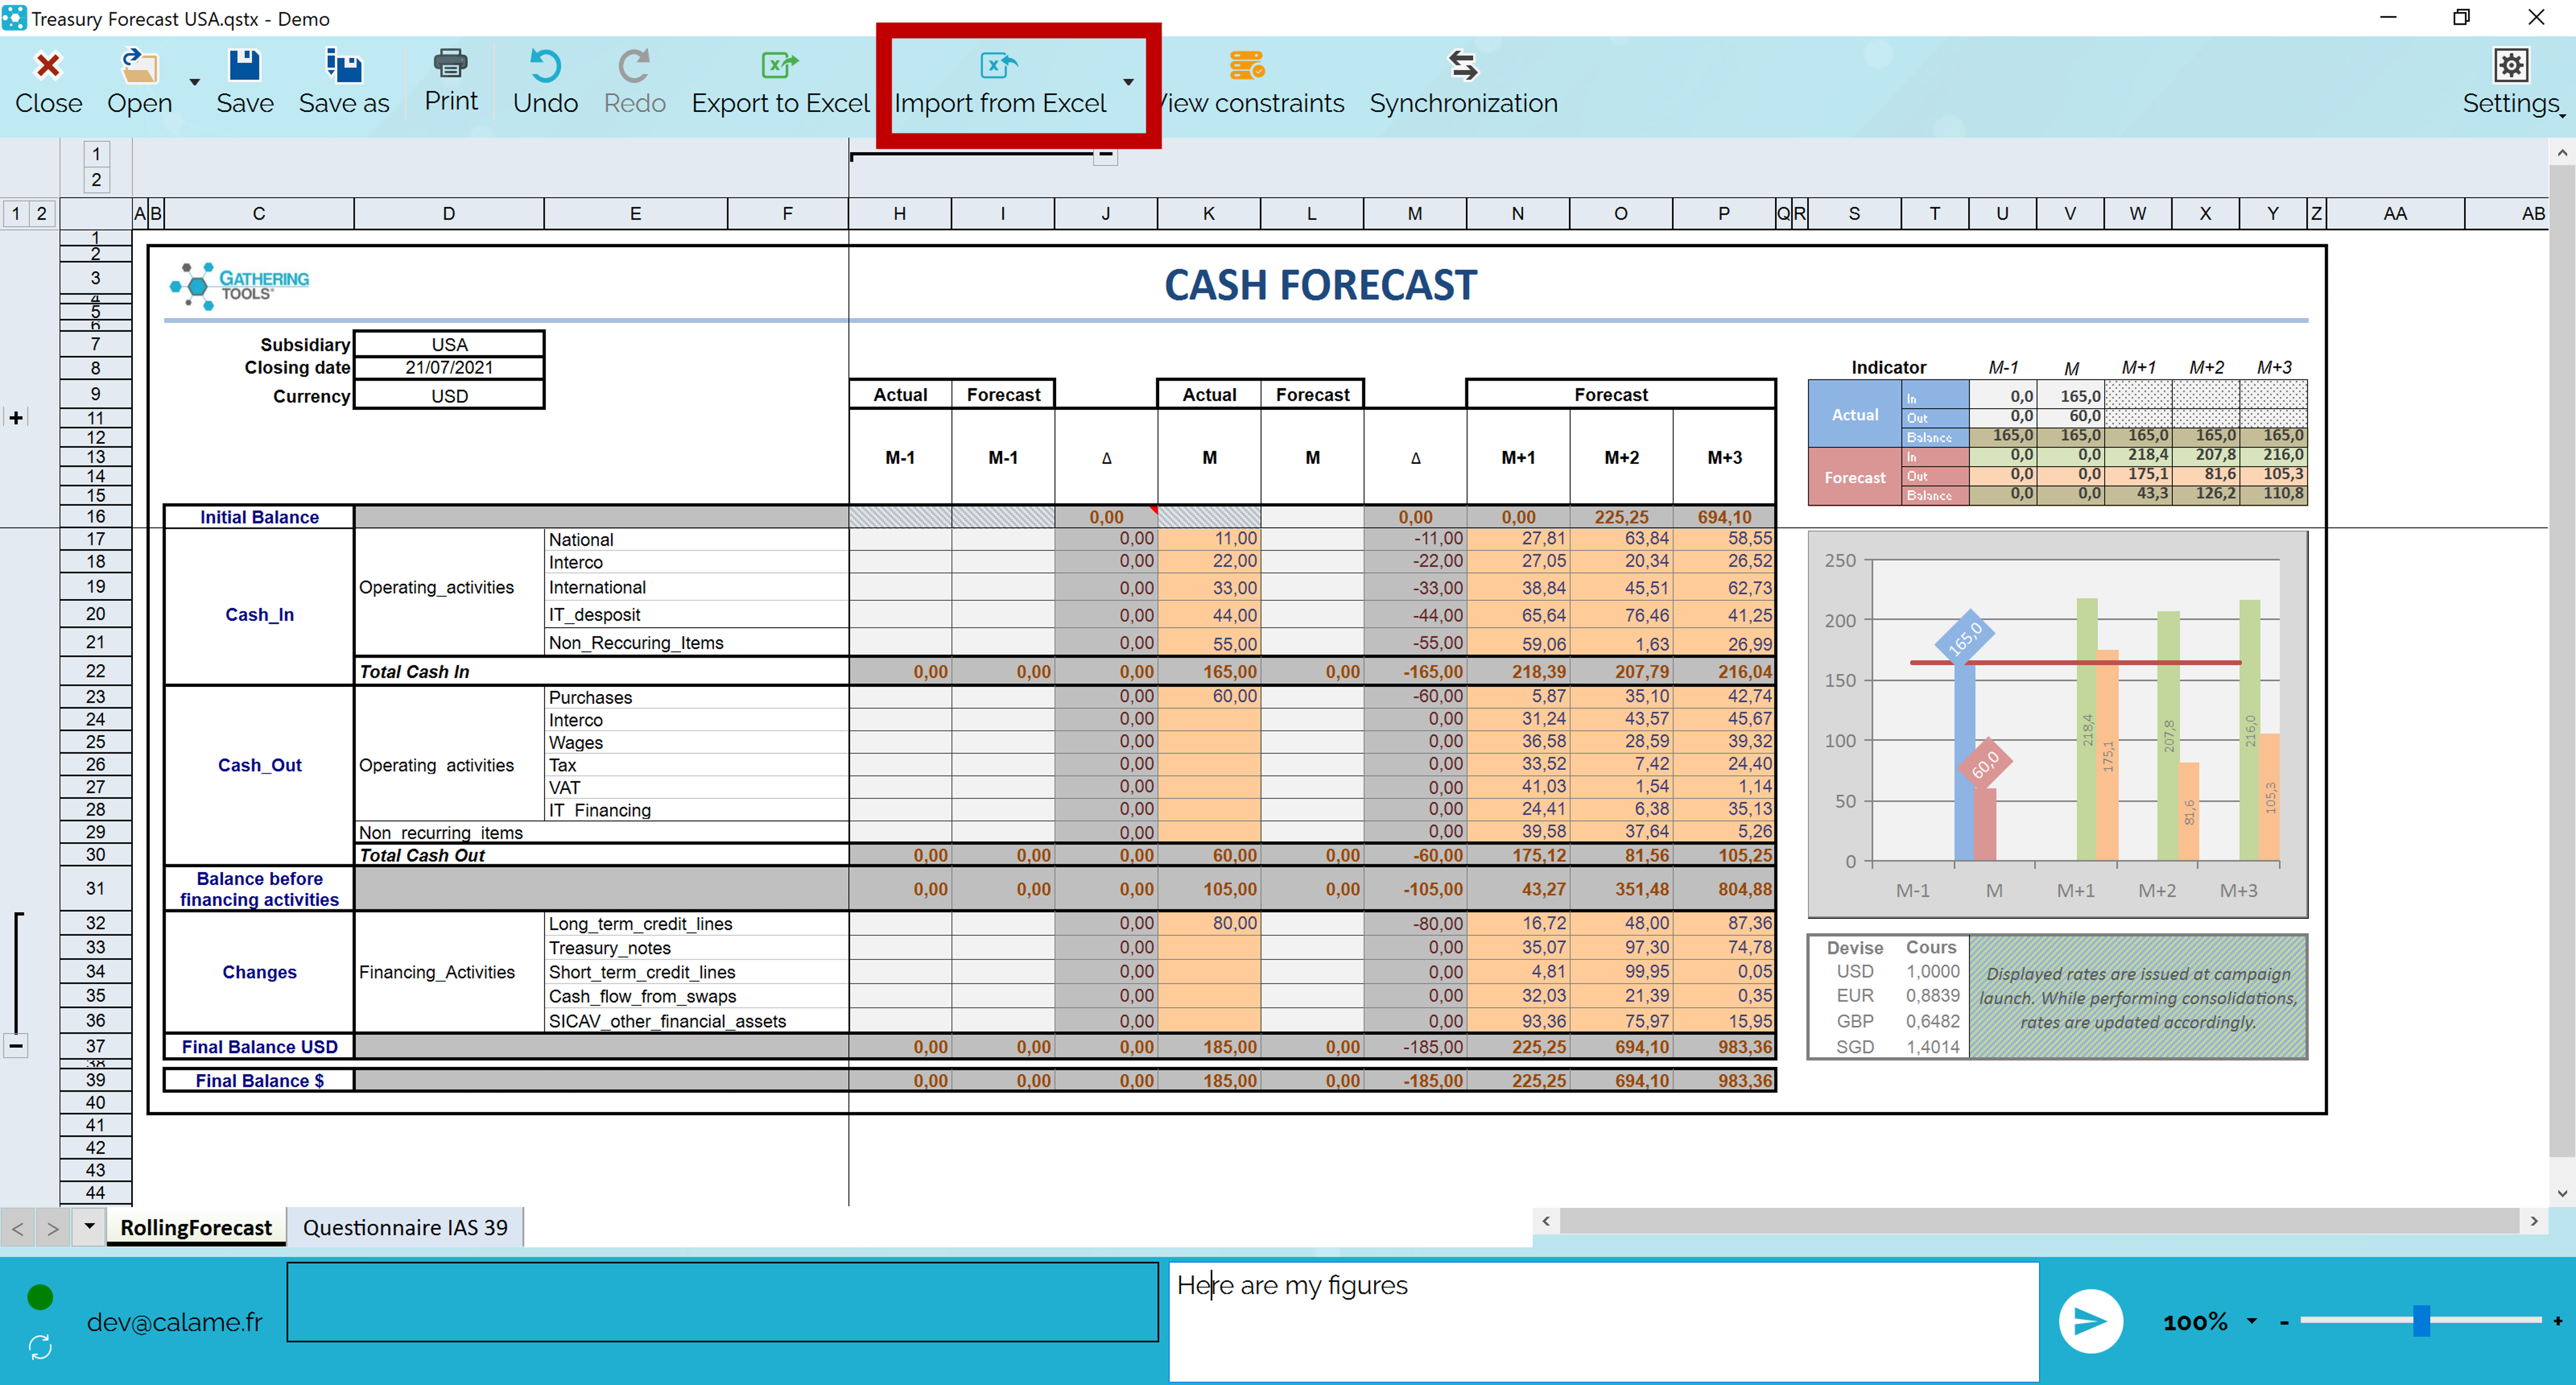
Click on the “Import from Excel” button to open the import wizard.
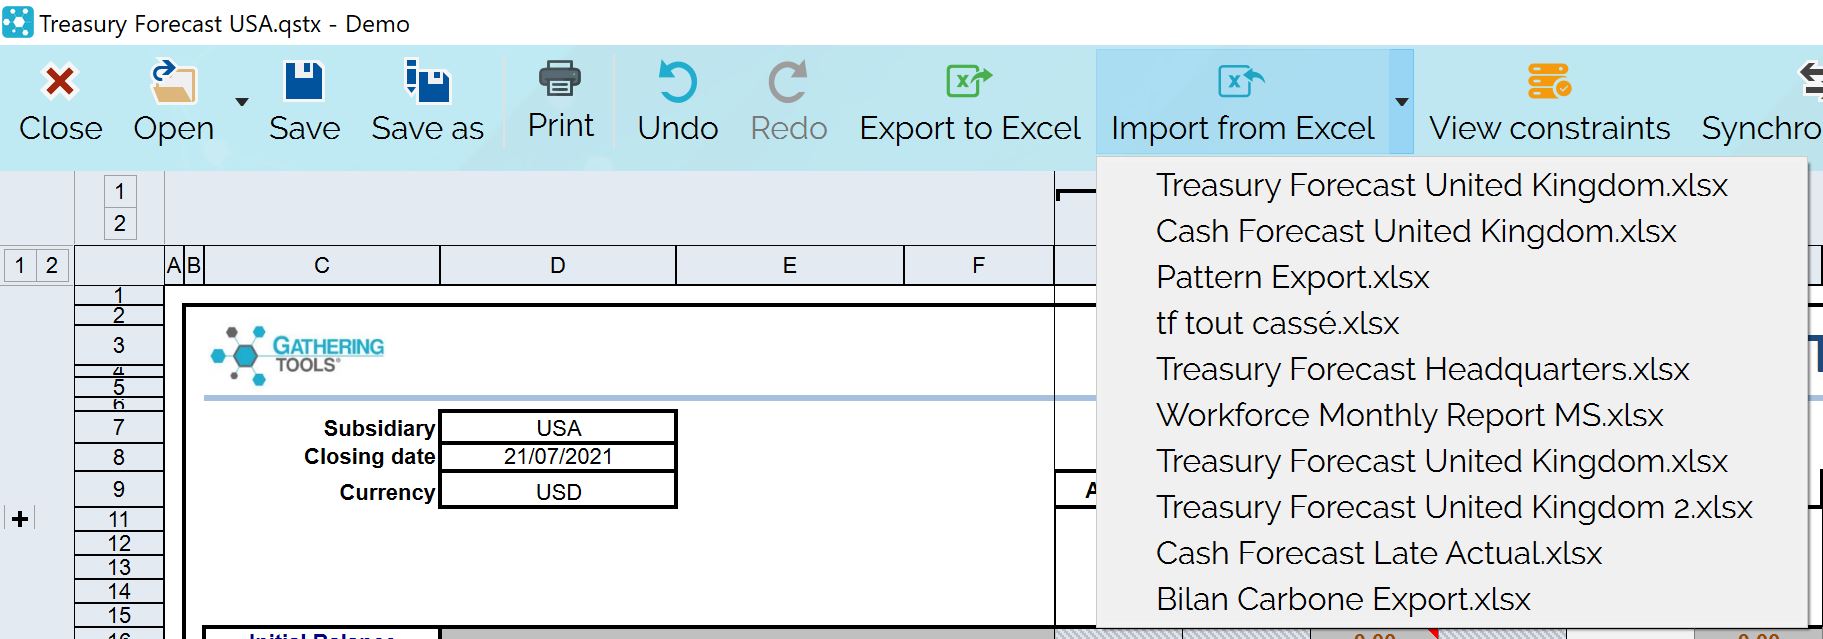
A dialog box will open allowing you to select the Excel file whose data you wish to import.
Note that the application remembers the last imported files. So if you want to import a file several times in a row, just select it from the list.
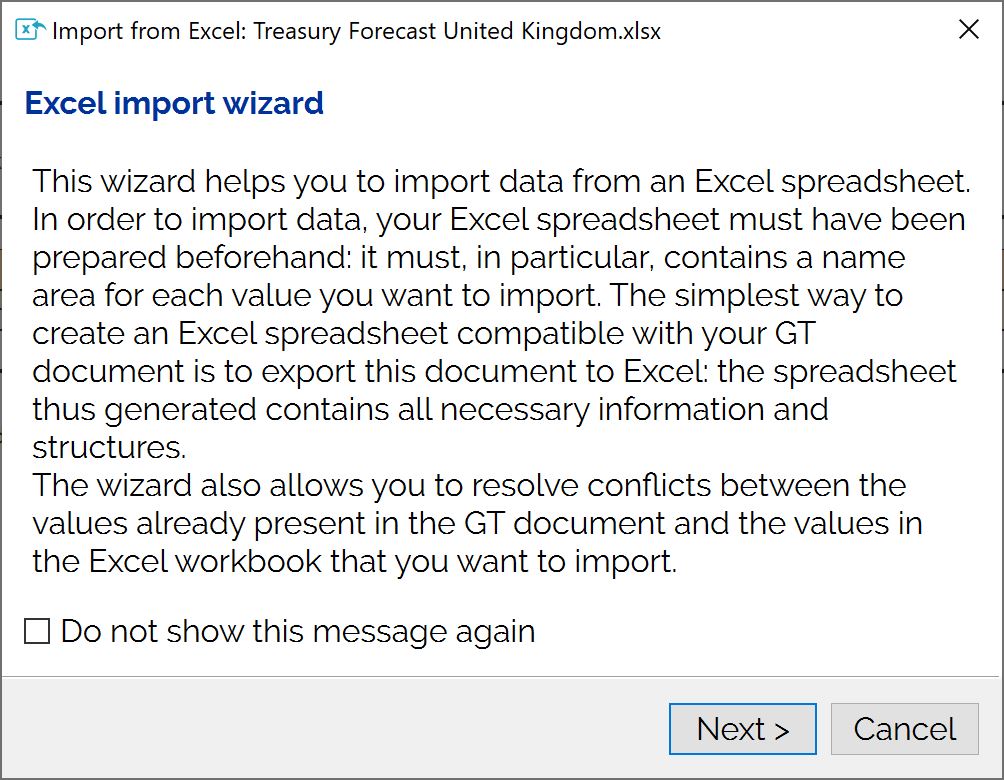
The first page of the wizard describes its functionality. Click on “Don’t show this message again” so that it doesn’t appear on your next imports.
Click on “Next”.
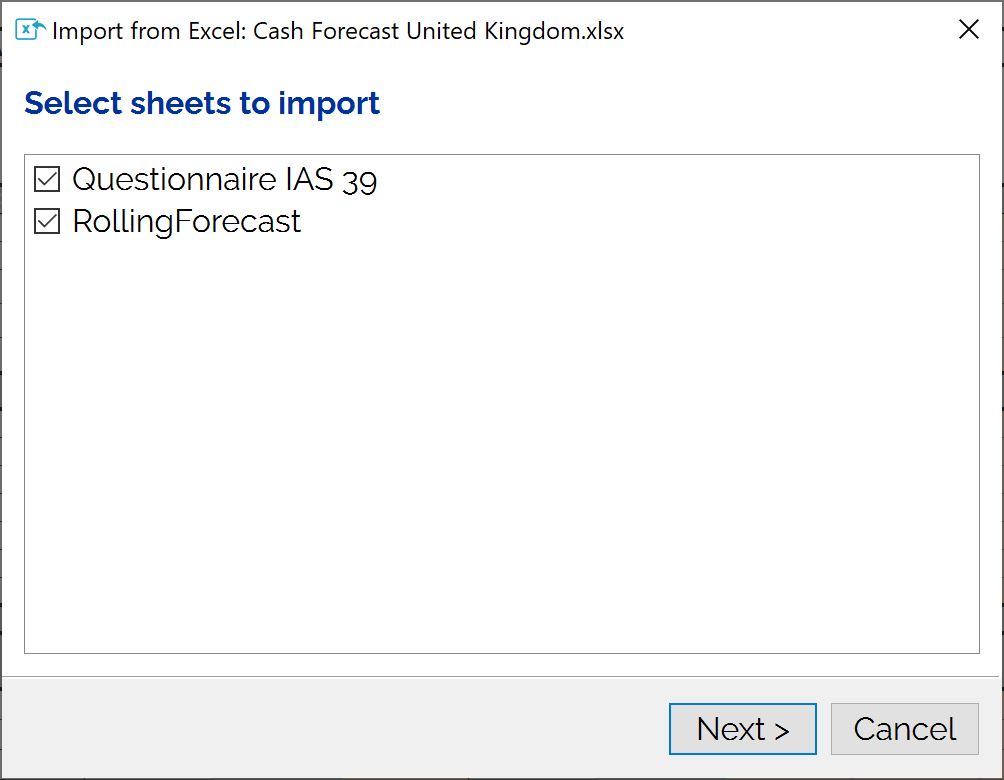
The wizard will ask us to choose the sheets of the Excel workbook whose data we wish to import. By default, all sheets are selected.
Click on “Next”.
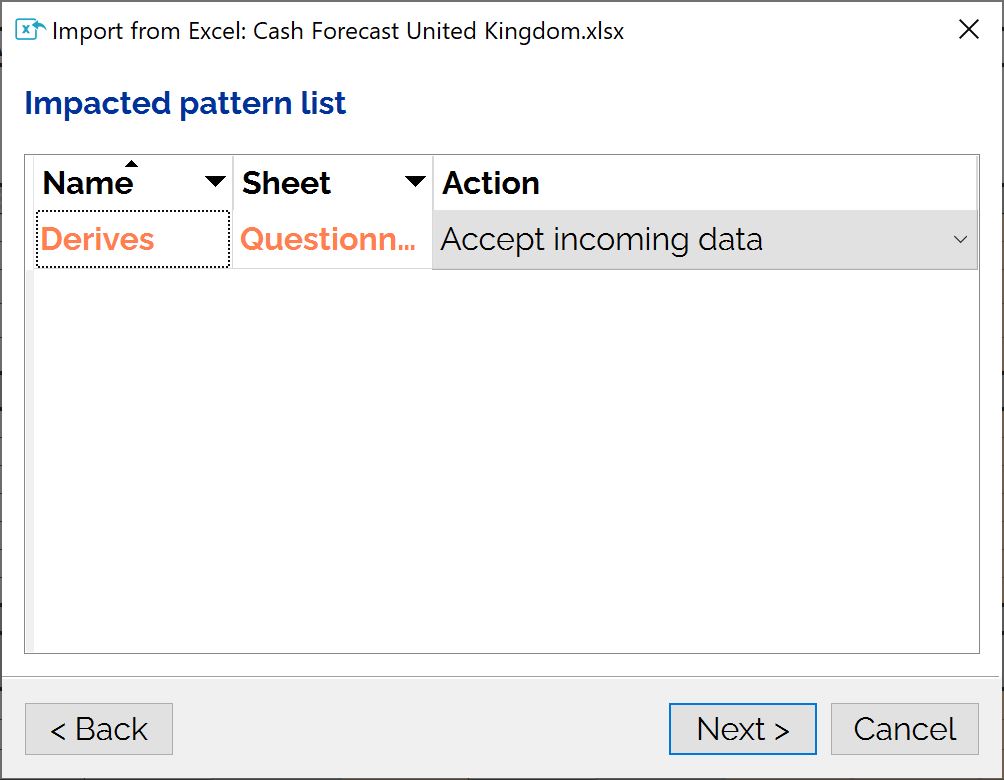
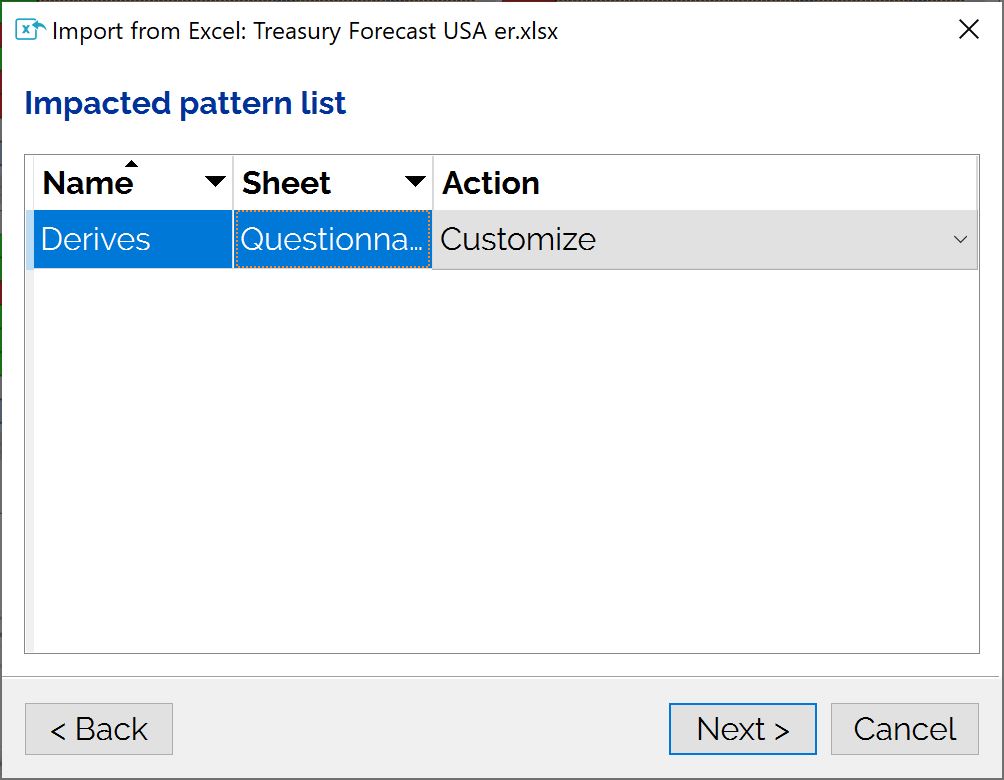
For each pattern in the questionnaire, the wizard will ask us to choose whether the data in the Excel file should replace the data in the questionnaire.
Several choices are offered (column “Action”)
- “Accept all modifications and additions”. This is the default mode. The data from the Excel file will replace the data from the questionnaire and if it contains new rows, these will be added to the pattern.
- “Accept all current changes and additions”: the current data will be kept
- “Accept all additions, current default”. Keep current data, but accept new data from the Excel file
- “Accept all additions, remote default”. Keep current data, but accept new data from the database.
Since our questionnaire is empty and we want to add all data from the Excel file, we will keep the default mode. Click on “Next”.
The import is now complete.
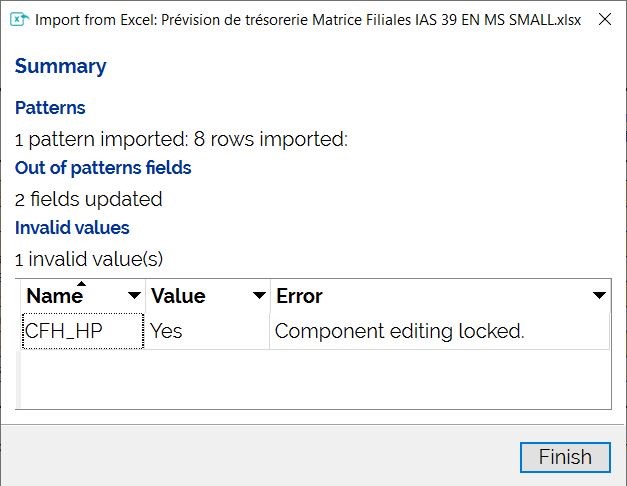
Once the import is complete, a summary is displayed. In our case :
- 1 pattern has received data, and 8 rows have been imported.
- 2 fields that were not in the patterns have had their values updated.
- 1 value is invalid and couldn’t be filled in.
You can search for the name (in our example “CFH_HP”) in the named fields of your excel workbook.
Correcting errors
If the Excel workbook contains values that do not respect the type constraints or the limits of the cells to be updated, the application will display the list of errors during the synthesis:
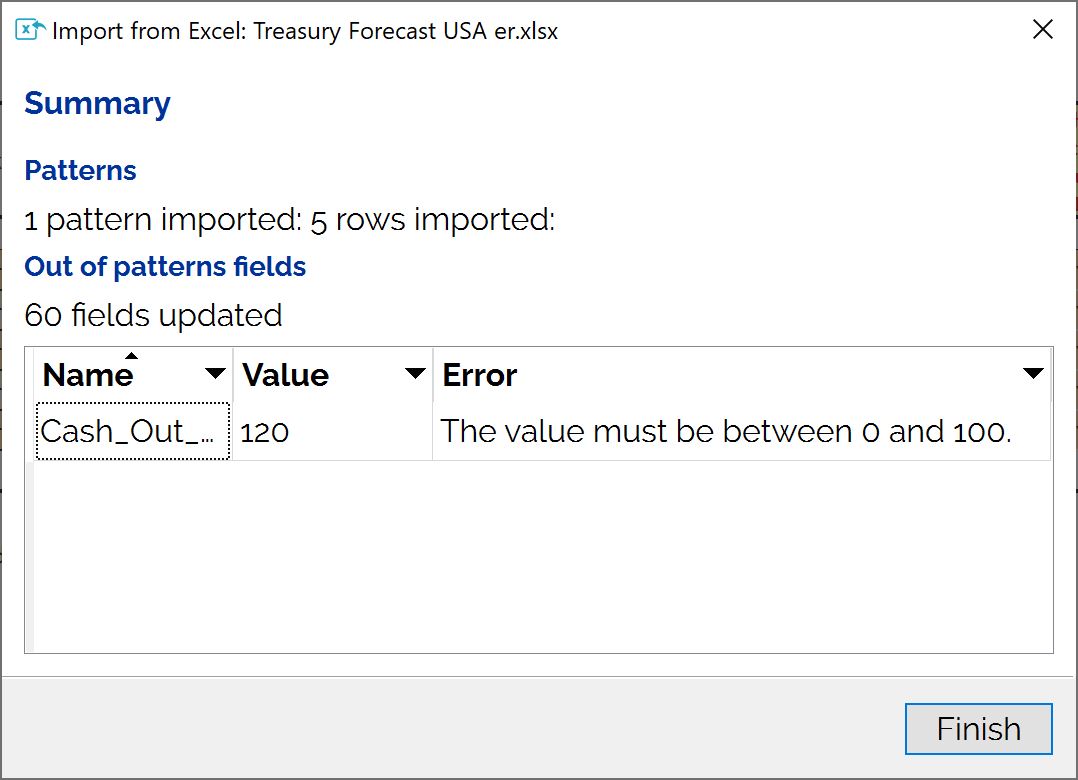
The cells concerned are not updated
To correct the values in the Excel workbook, proceed as follows:
Select the name of the value in error from the list (Ctrl+C)
In Excel, paste the name into the Name field, Excel will then select the cell concerned.
Modify the value, save the workbook and then run the import procedure again.
Please note that while Excel import allows you to add rows to the patterns, it does not allow you to delete them.
Managing conflicts
When importing Excel, all values outside the patterns are replaced by the values in the Excel file. For the patterns, however, you can choose, line by line, which data you wish to update and which you wish to keep.
It is important to understand that the update of the patterns is done according to the pattern key, the key is a column or a set of columns whose combination must provide a unique value for each row
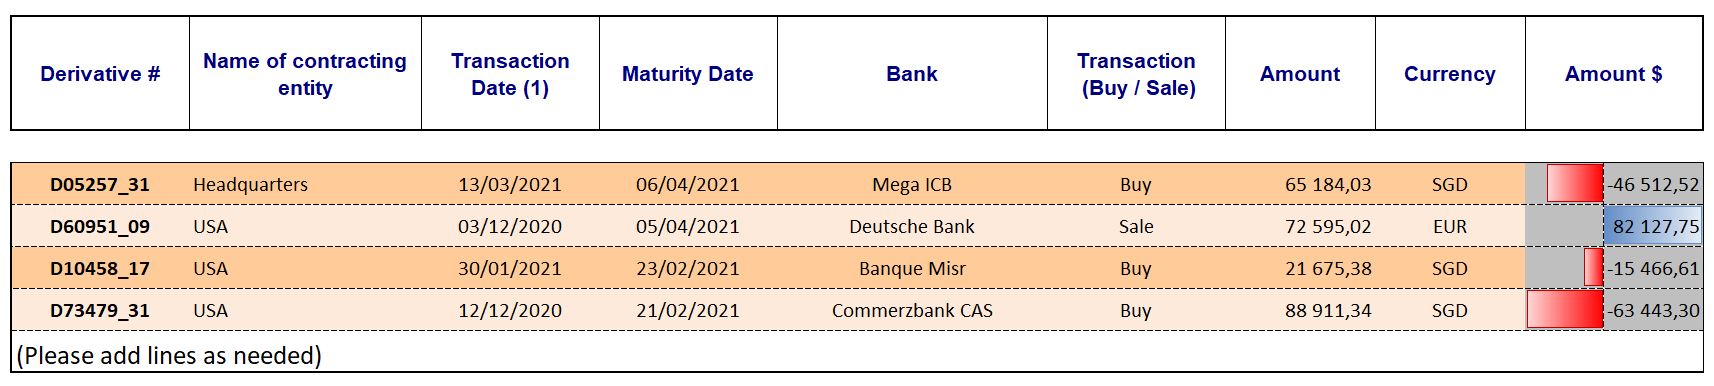
In our document, the pattern key is the “Derivative” column. Our pattern already contains 2 rows of data: the derivatives “1” and “2”.

The Excel workbook we are importing contains 4 rows with the derivatives “D05257_31”, “D60951_09”, “D10458_17” and “D73479_31
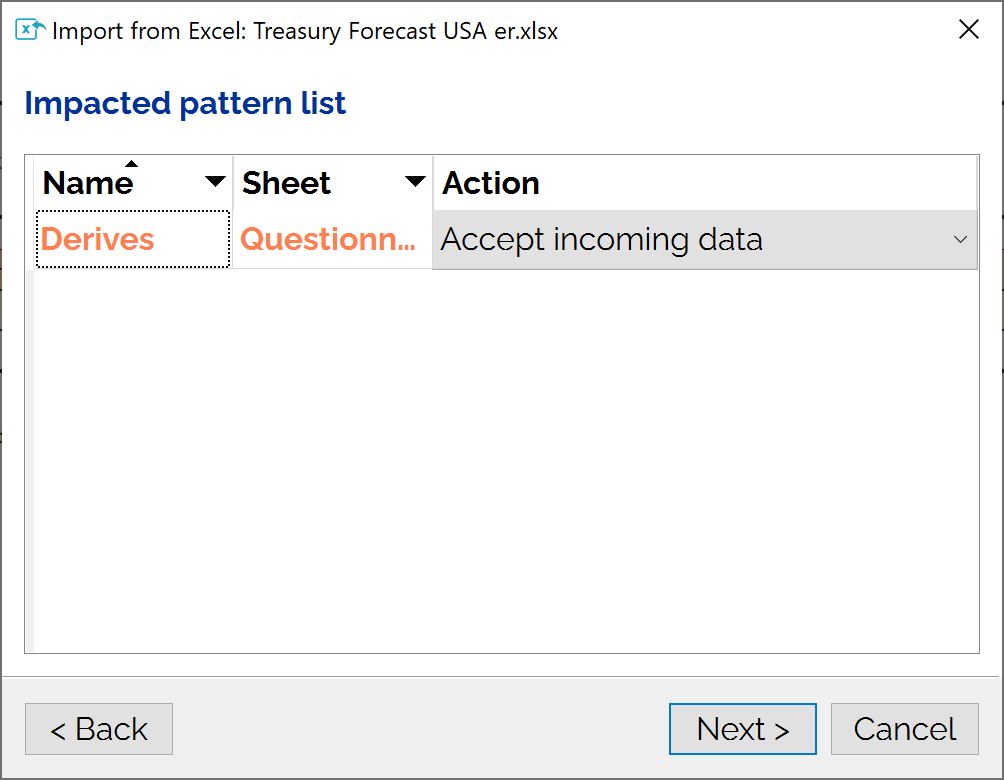
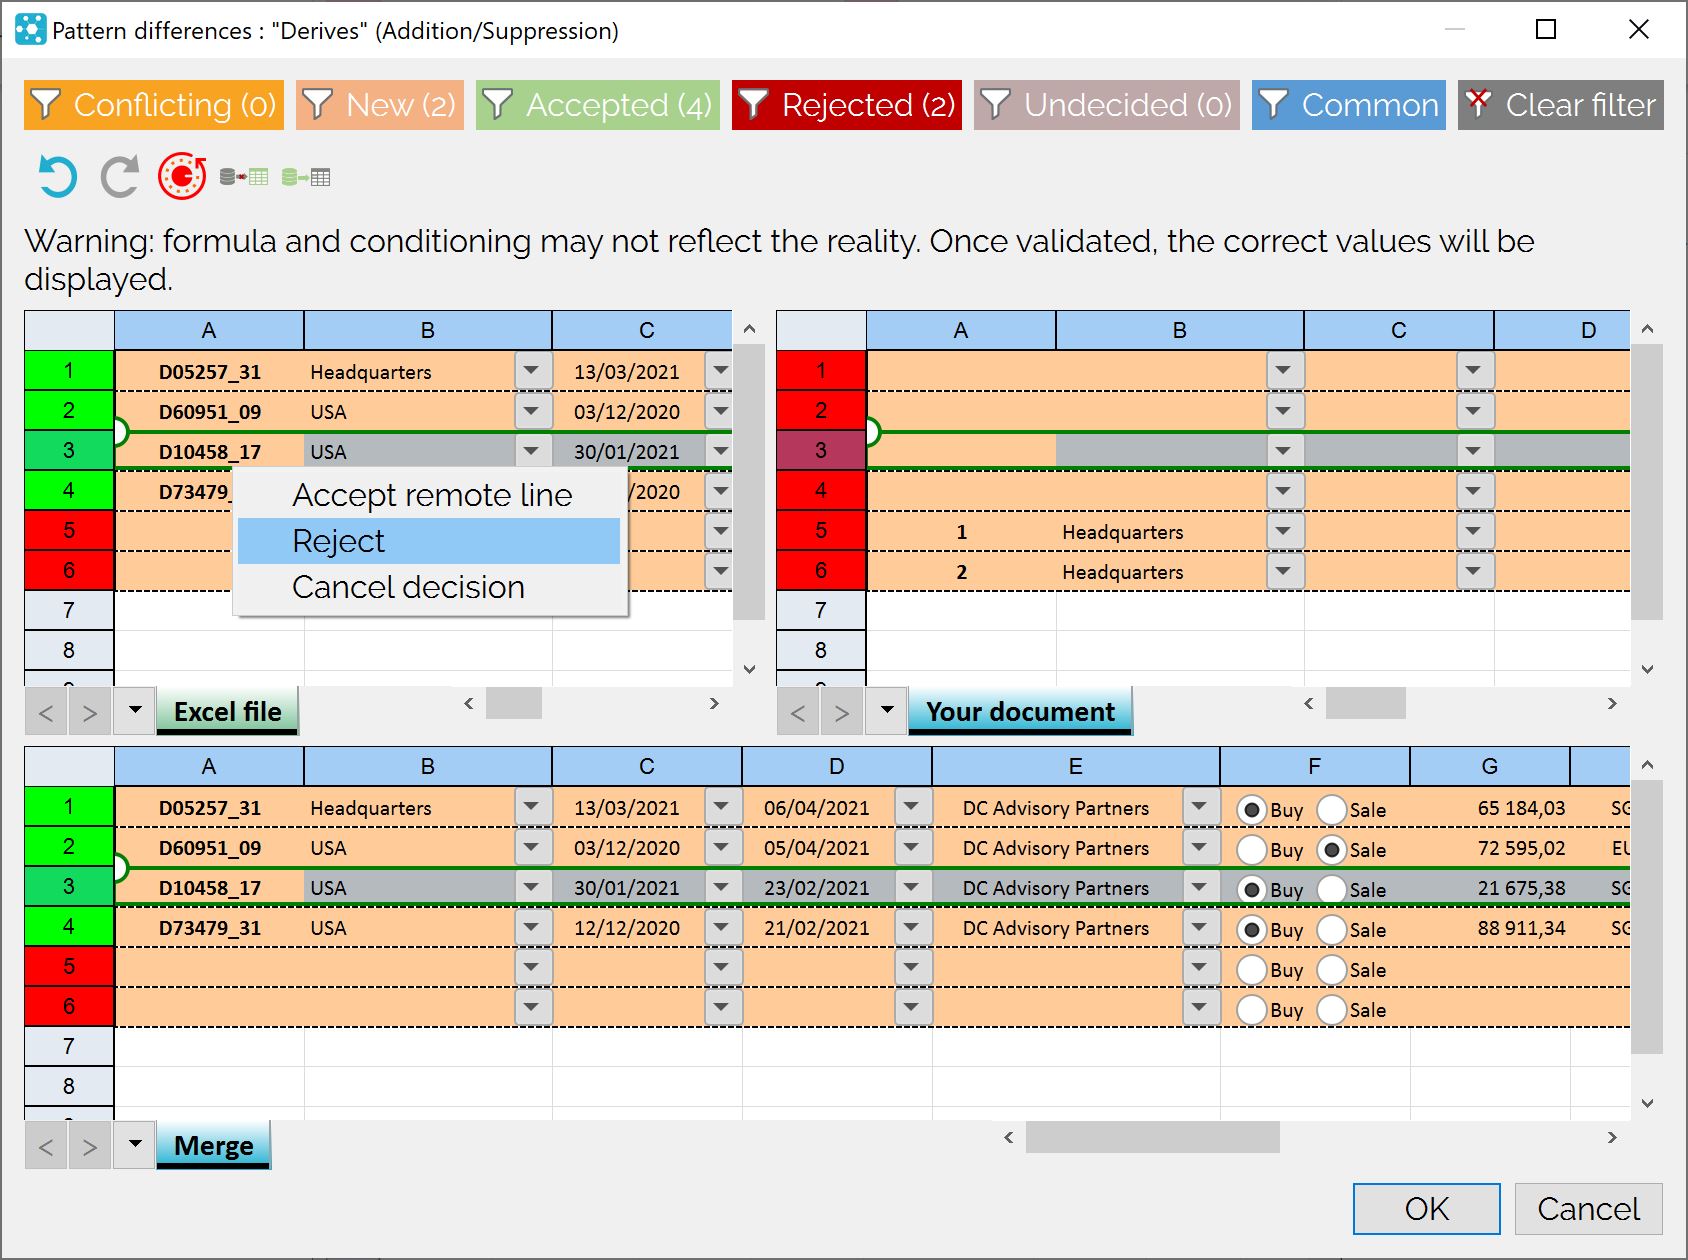
In the wizard, we will customise the pattern update. To do this, we will double-click on the line of the pattern.
The wizard then opens the conflict manager:
We can see the 4 rows of our Excel workbook on the left, and the 2 rows of our questionnaire on the right.
We want our document, after import, to :
- Keep the 2 rows it already has
- Add all the rows from the Excel workbook except the one from the derivative “D10458_17”.
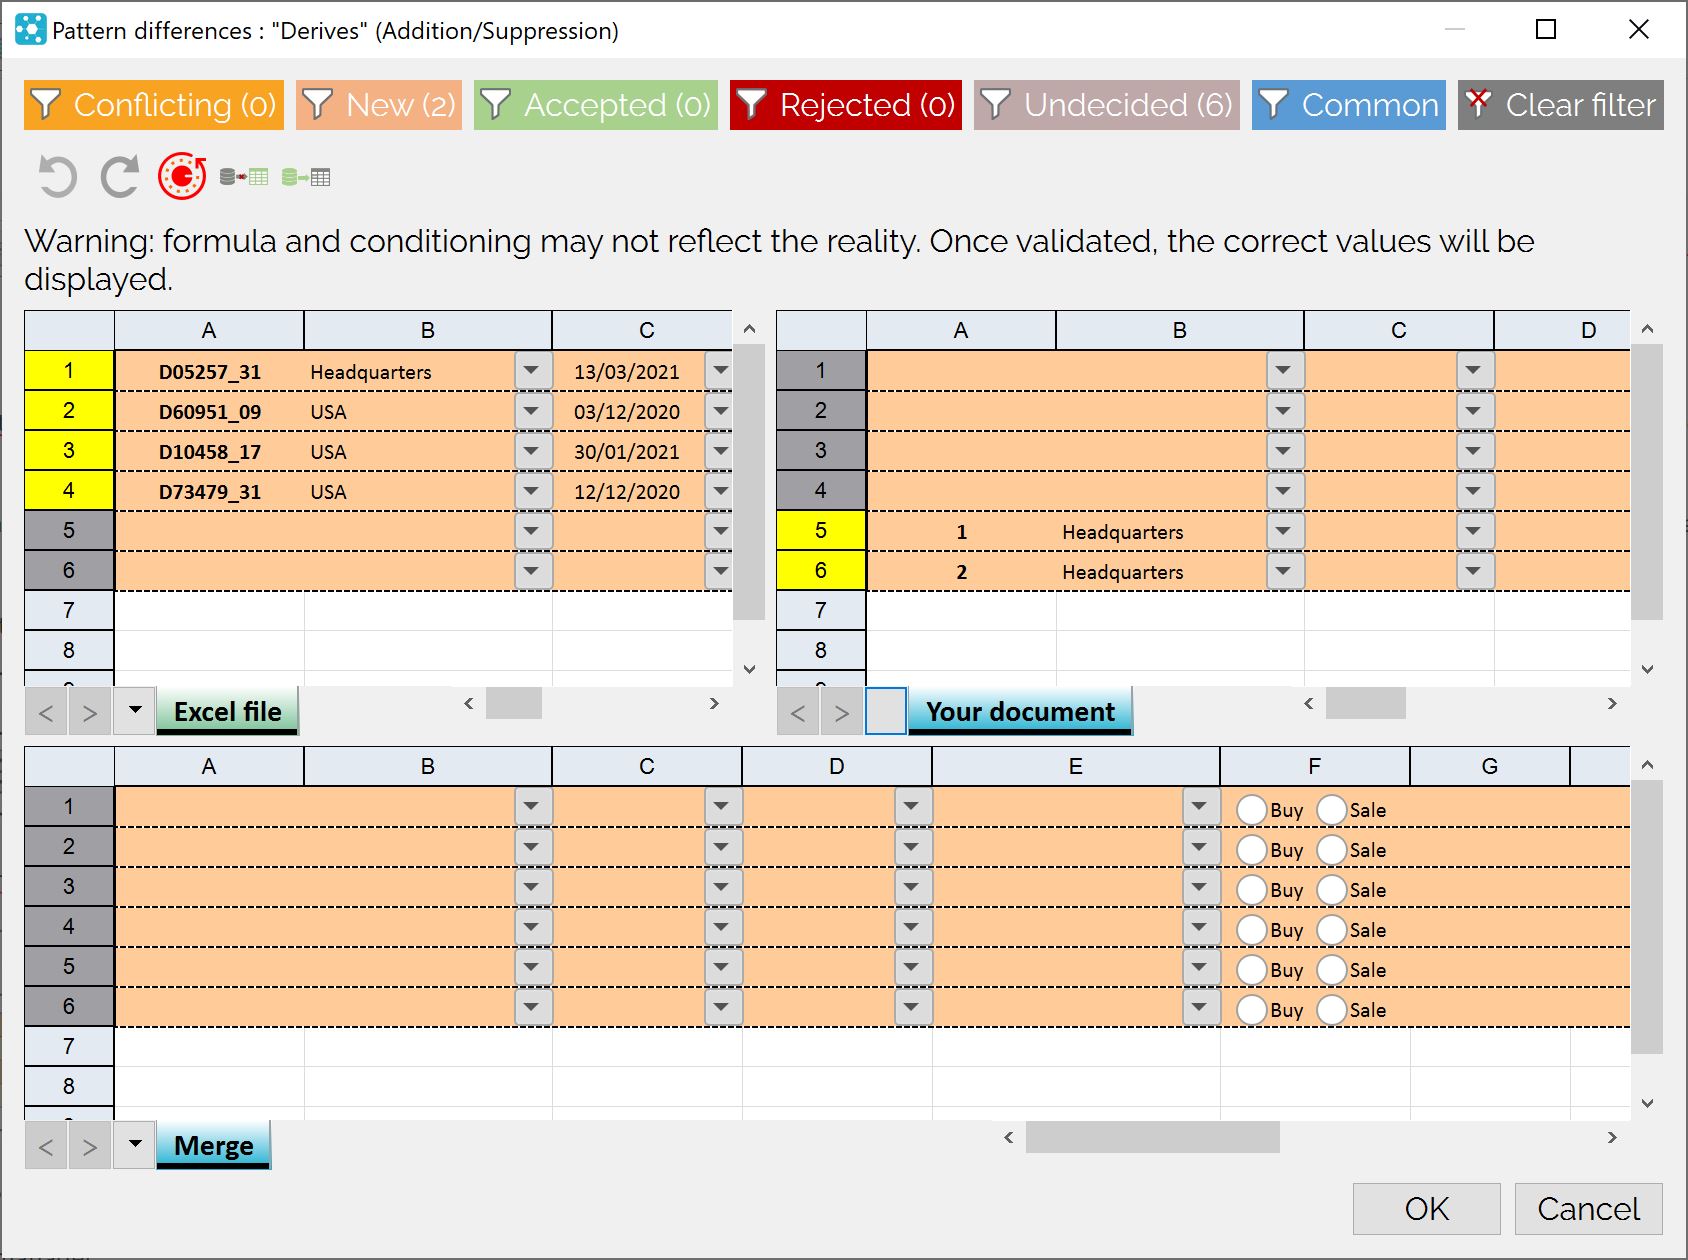
We will start by accepting the rows from the Excel workbook. Rather than selecting them one by one, we will click on the button ![]() , which allows us to import all the rows from Excel.
, which allows us to import all the rows from Excel.
We get the following result:
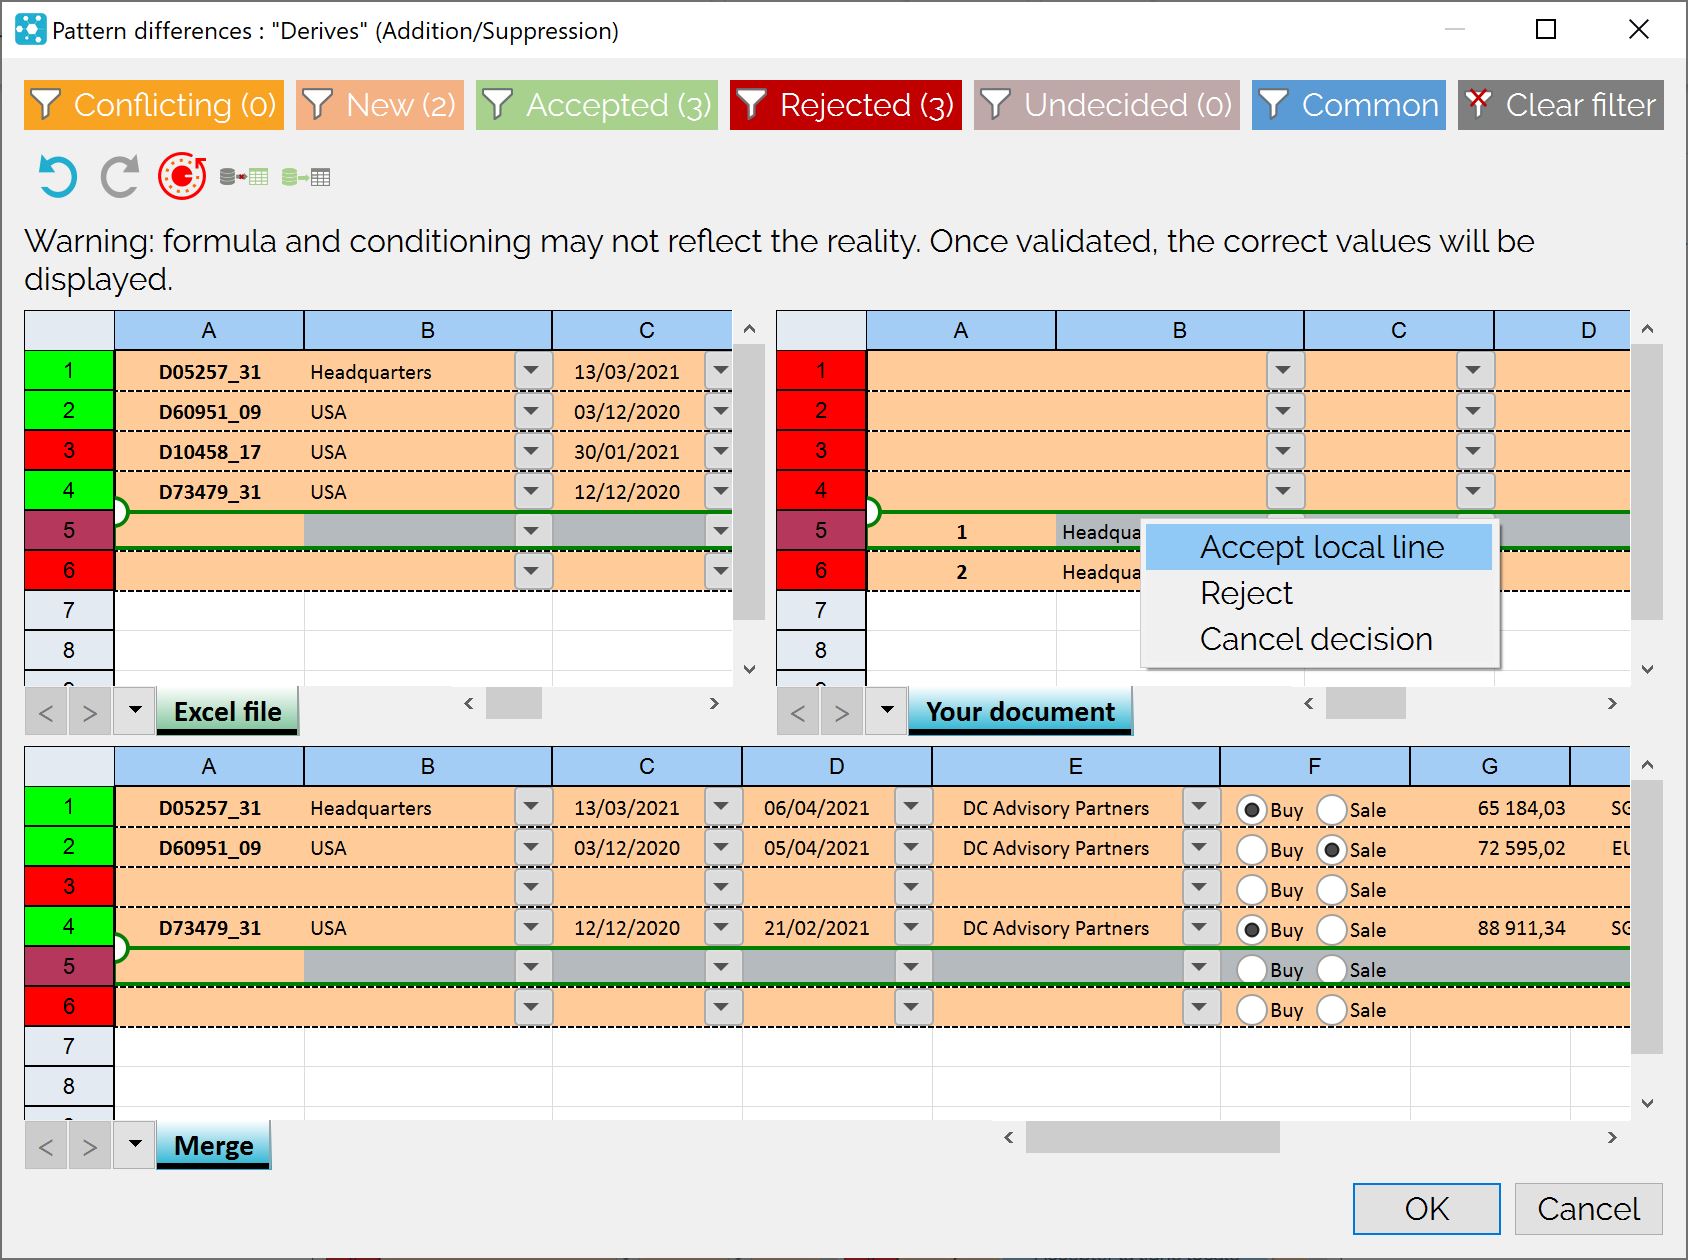
The 4 rows of the Excel workbook are accepted (they appear in green), the 2 rows of our current document are refused (they appear in red). To delete the line relating to the derivative “D10458_17”, we will right-click on the corresponding line and, in the pop-up menu, select the “Reject” option:
All that remains is to accept the 2 lines of the current document in succession:
We end up with the following result:
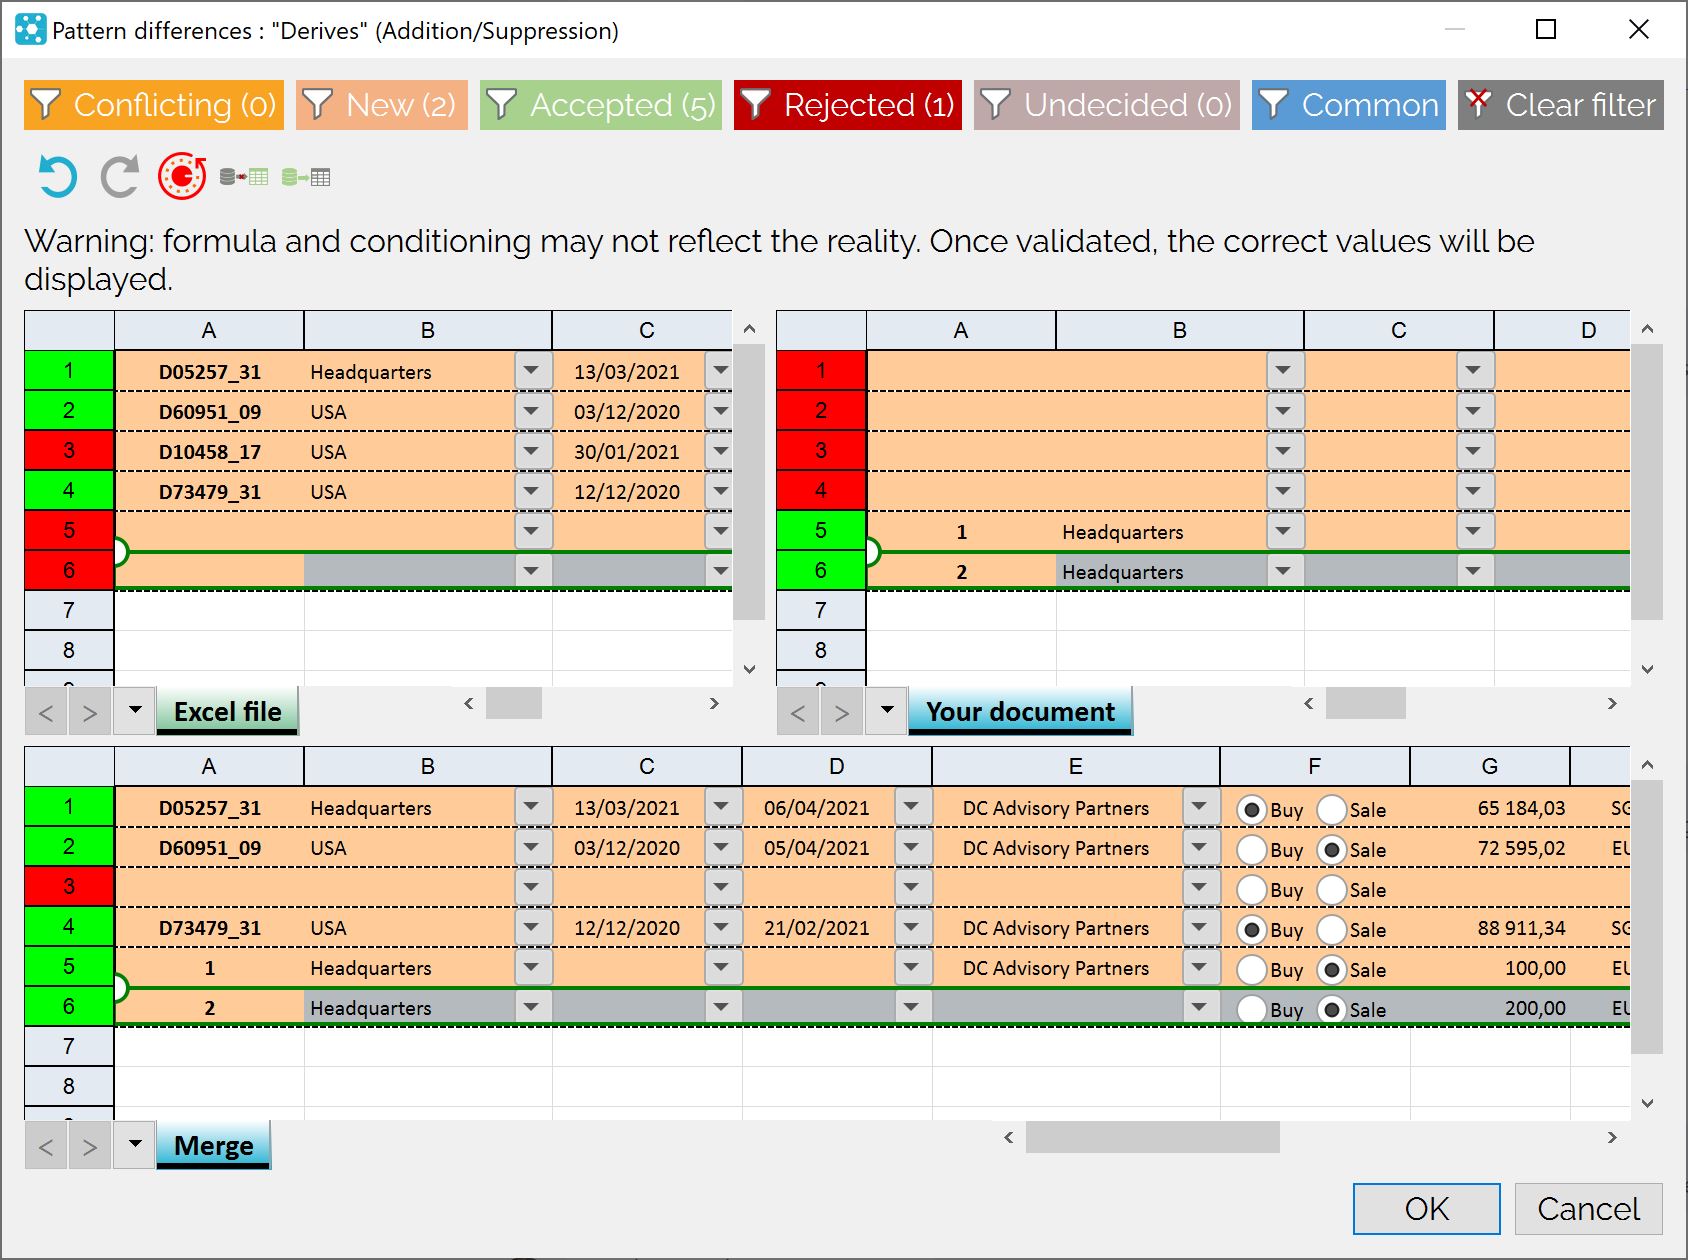
We can validate the configuration by clicking on “Ok”.
Note that the pattern appears in green in the wizard, a sign that it has been correctly configured.
Note: By clicking on “Cancel” you cancel the synchronisation, the server values will not be updated.
After closing the wizard, here is our result: