

How can we help?
Search for answers or browse our knowledge base
Launching a data collection campaign
Here’s how to start a collection campaign.
Preparing data for the campaign
Back up the client database.
Check with the IT department managing the client database that it is backed up before making any changes to the data in the database (or integrating data from a new campaign, executing an SQL action, etc.).
Enter/modify/check the statement date
The statement date corresponds to the date of the collection session.
The statement date does not necessarily match the campaign launch date: for example, if successive publications are carried out (part of the entities on one day and the rest of the entities on another day) and if these publications ask the correspondents to fill in data concerning the same period, then the statement date will be the same: the successive publications correspond to the same campaign or query session: the responses received to the questionnaires (even if they were sent on different dates) will be viewed by the manager in the same campaign.
Choose a statement date (generally the 15th of the month corresponding to the month of interrogation for monthly campaigns).
The end date can be updated:
- By executing an SQL action
- By updating the date manually when the action is executed
Updating the reference data
This update is generally done using a configuration questionnaire. The data to be updated generally concerns the list of entities and correspondents, as well as the other reference data of the project.
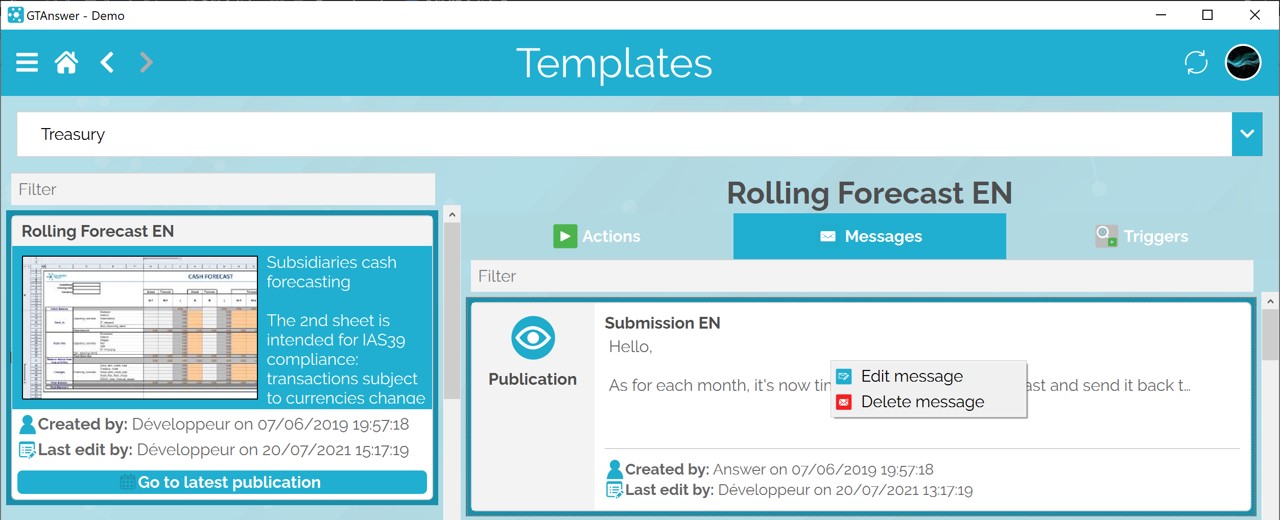
Creating/modifying messages
All users normally have an account – just like you. When logging into the project, each user will have access to their notifications, which will tell them the status of that portion of the project which concerns them. These notifications are also sent by email. However, respondents may not have an account. In this case, they are recognized by the system using their validated email address. And as they do not have access to the discussion threads, all the events of the campaign are sent by email:
|
|
Sent when | Users with an account |
Users without account |
| Publication | Sent to correspondents with questionnaire at time of publication |
X |
X |
| First Answer | Sent to correspondent and/or respondent when GTServer receives their first answer |
X |
|
| New Answer | Sent to the correspondent and/or respondent when GTServer receives an answer other than the first one |
X |
|
| End campaign | Sent to correspondent and/or respondent when the campaign is over and the publication closed |
X |
X |
| Answer refused, campaign closed | Sent to the correspondent and/or respondent when he/she has responded, while offline, to a questionnaire from a closed campaign |
X |
|
| Answer refused, questionnaire closed | Sent to the correspondent and/or respondent when he/she has responded, while offline, to a questionnaire placed in refusal to answer |
X |
|
| Follow-up |
Sent to the correspondent and/or respondent when a reminder is triggered by the manager |
X |
X |
You can edit these messages in the templates page, by selecting the appropriate template and then editing the messages in the “Messages” tab
Distinguishing between respondents with and without an account
By default, users have an account. In this case, when a user responds, their account name appears next to their response. If the respondent does not have an account and has responded using the “backup connection” by email, then the email address they have validated will appear.
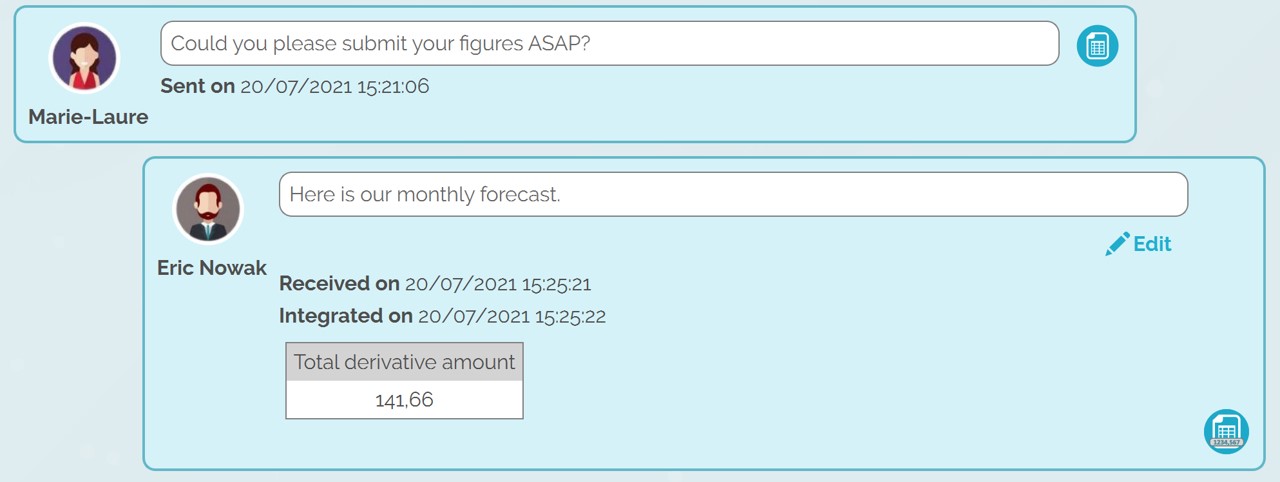
The respondent (Eric Nowak) has an account
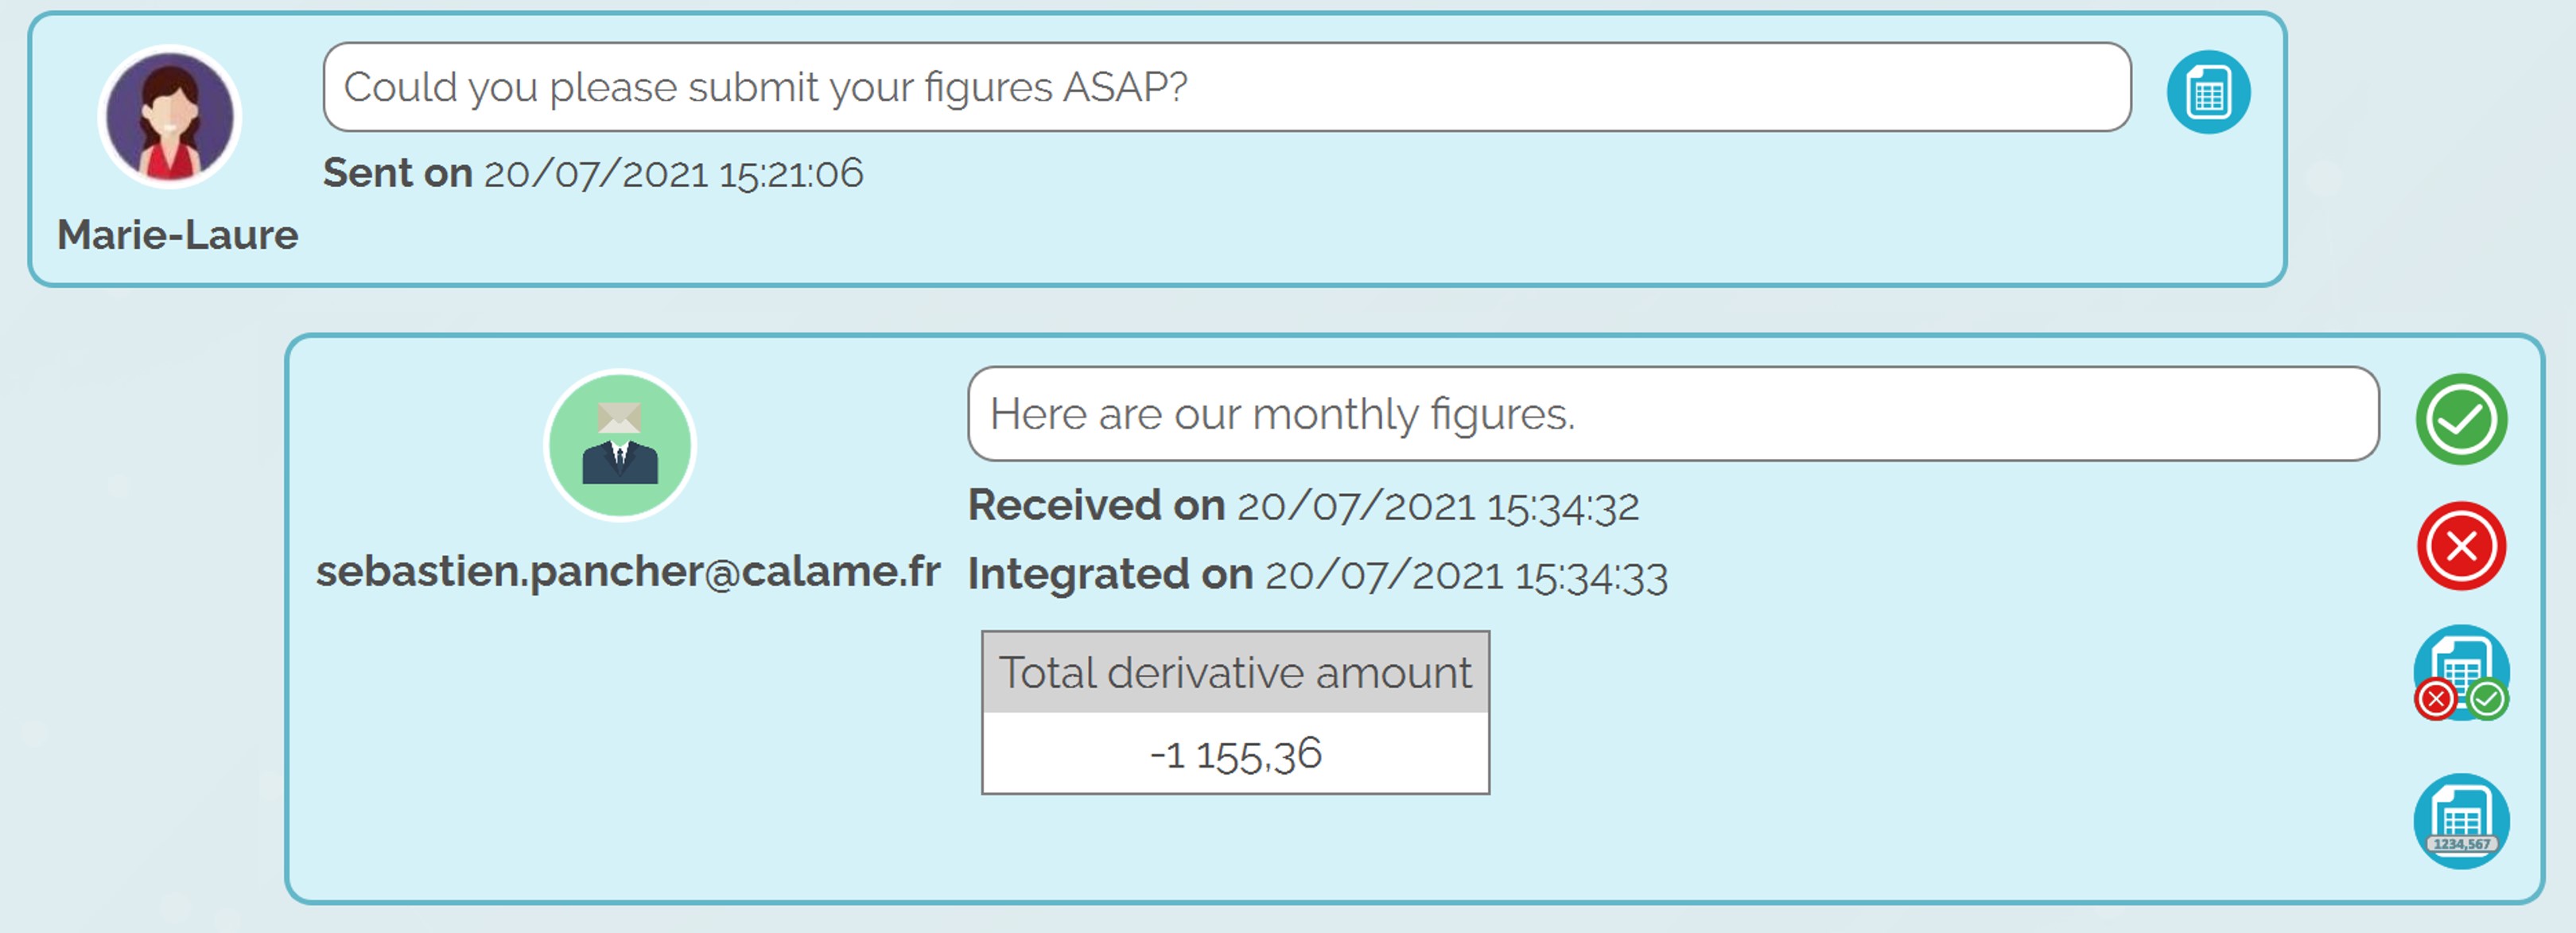
The respondent has sent his data by email. It is his validated email address (s.pancher@calame.fr) that identifies him
Definitions of correspondent and respondent
When users respond using the “backup connection” by email, messages can be sent to the correspondent or the respondent.
The correspondent is the initial recipient of the questionnaire.
In the email, the correspondent is the person who appears in the “To” address field.
The respondent is the email address of the person who actually transmits the answer in GTAnswer (when the email address validation is required by the questionnaire).
As a reminder, the questionnaires can be exported as files (.QSTX extension). They can then be sent by email (or other means) to another person who can then answer them.
Editing messages
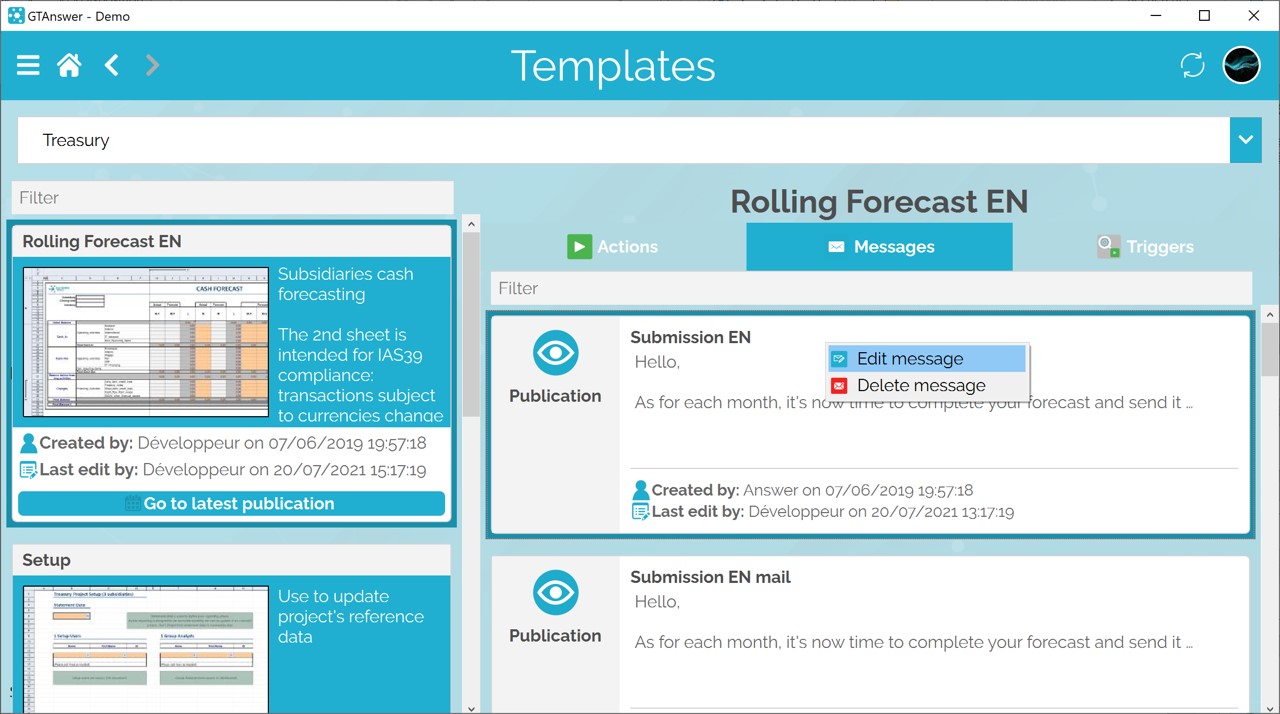
Select the message to be modified, then display the context menu (right-click) and choose Edit, or click on the Edit button in the toolbar. It is also possible to double-click on the message.
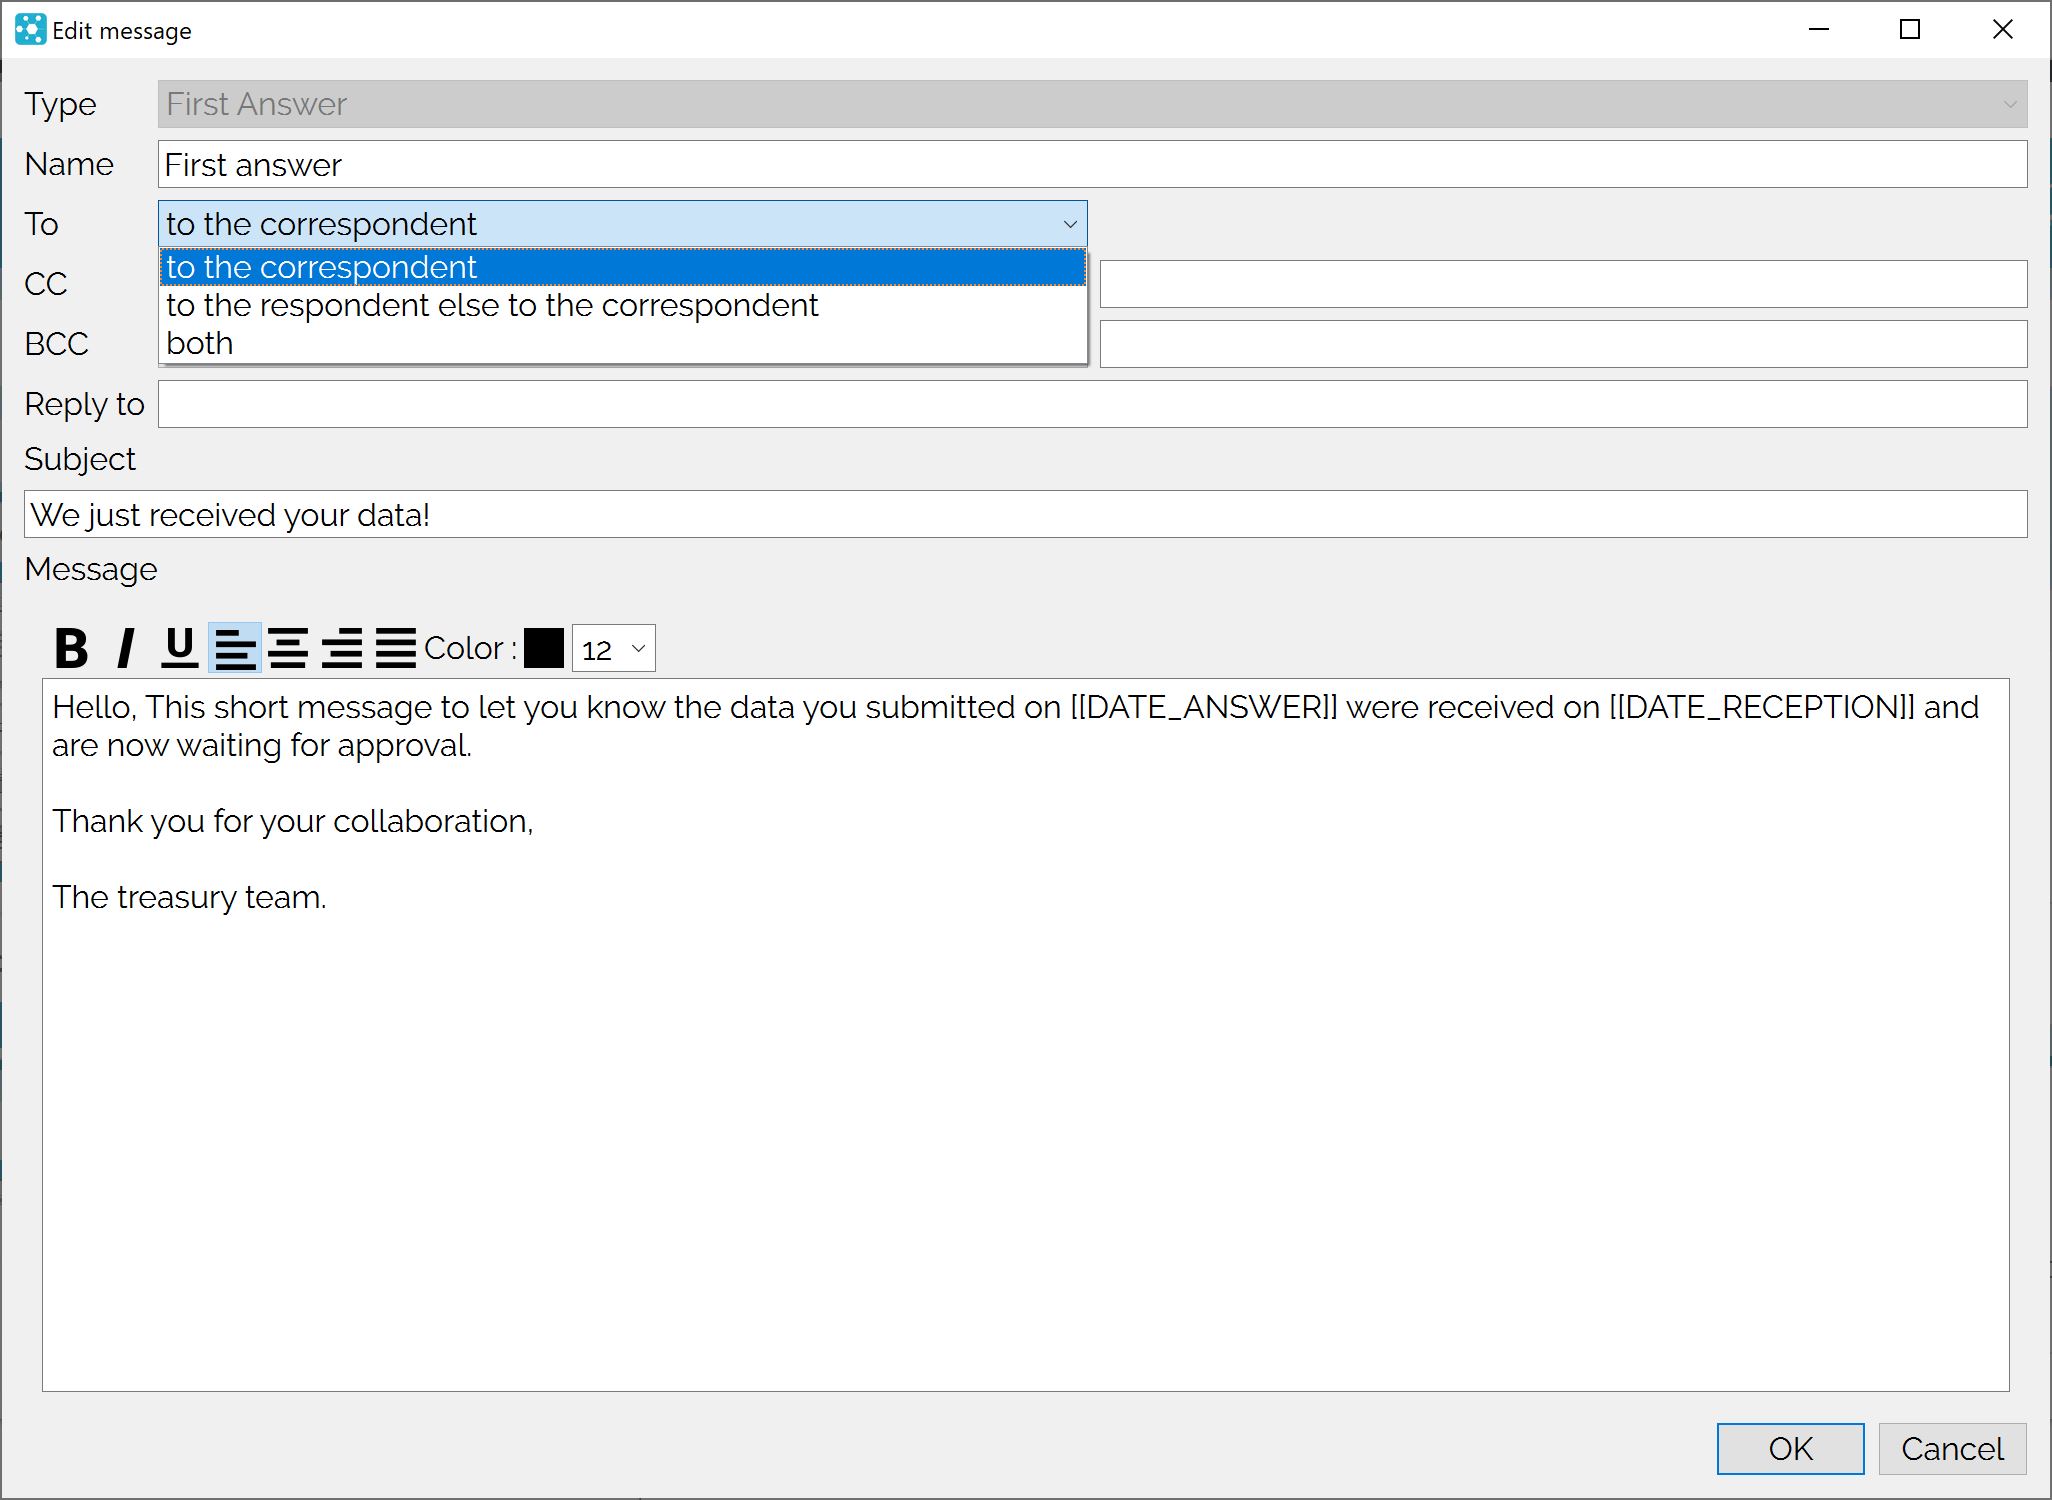
Field A can be assigned one of the following values:
- to the correspondent
- to the respondent or to the correspondent (i.e., if the address validation is not used)
- to both
The CC and BCC fields can have one of the following values:
- to correspondents
- to respondents otherwise to correspondents
- to both
The “Reply to” field corresponds to the email address that will be used by the correspondent’s email client if the latter replies directly to the email via its email client (and probably without sending the reply to GTAnswer). All GTServer mails (launch, 1st reply, etc.) are sent from the GTServer email address. Some correspondents may be tempted to reply directly to the email, in this case, and without the use of the “Reply to” field, it is the GTServer email address that would receive the reply email. The campaign managers would then have to monitor the mailbox of this address. By using the “Reply to” field, managers can specify an email address (or several) to which they have access to monitor these “off-GT” replies by correspondents. A keyword in double brackets can be used to specify different addresses for different entities.
The launch message and the reminder message can also be modified manually at the time of the execution of the campaign launch action and the execution of the reminder by the manager, respectively.
However, the changes to the messages made when these actions are executed are not retained from one execution to the next.
Changing messages at launch
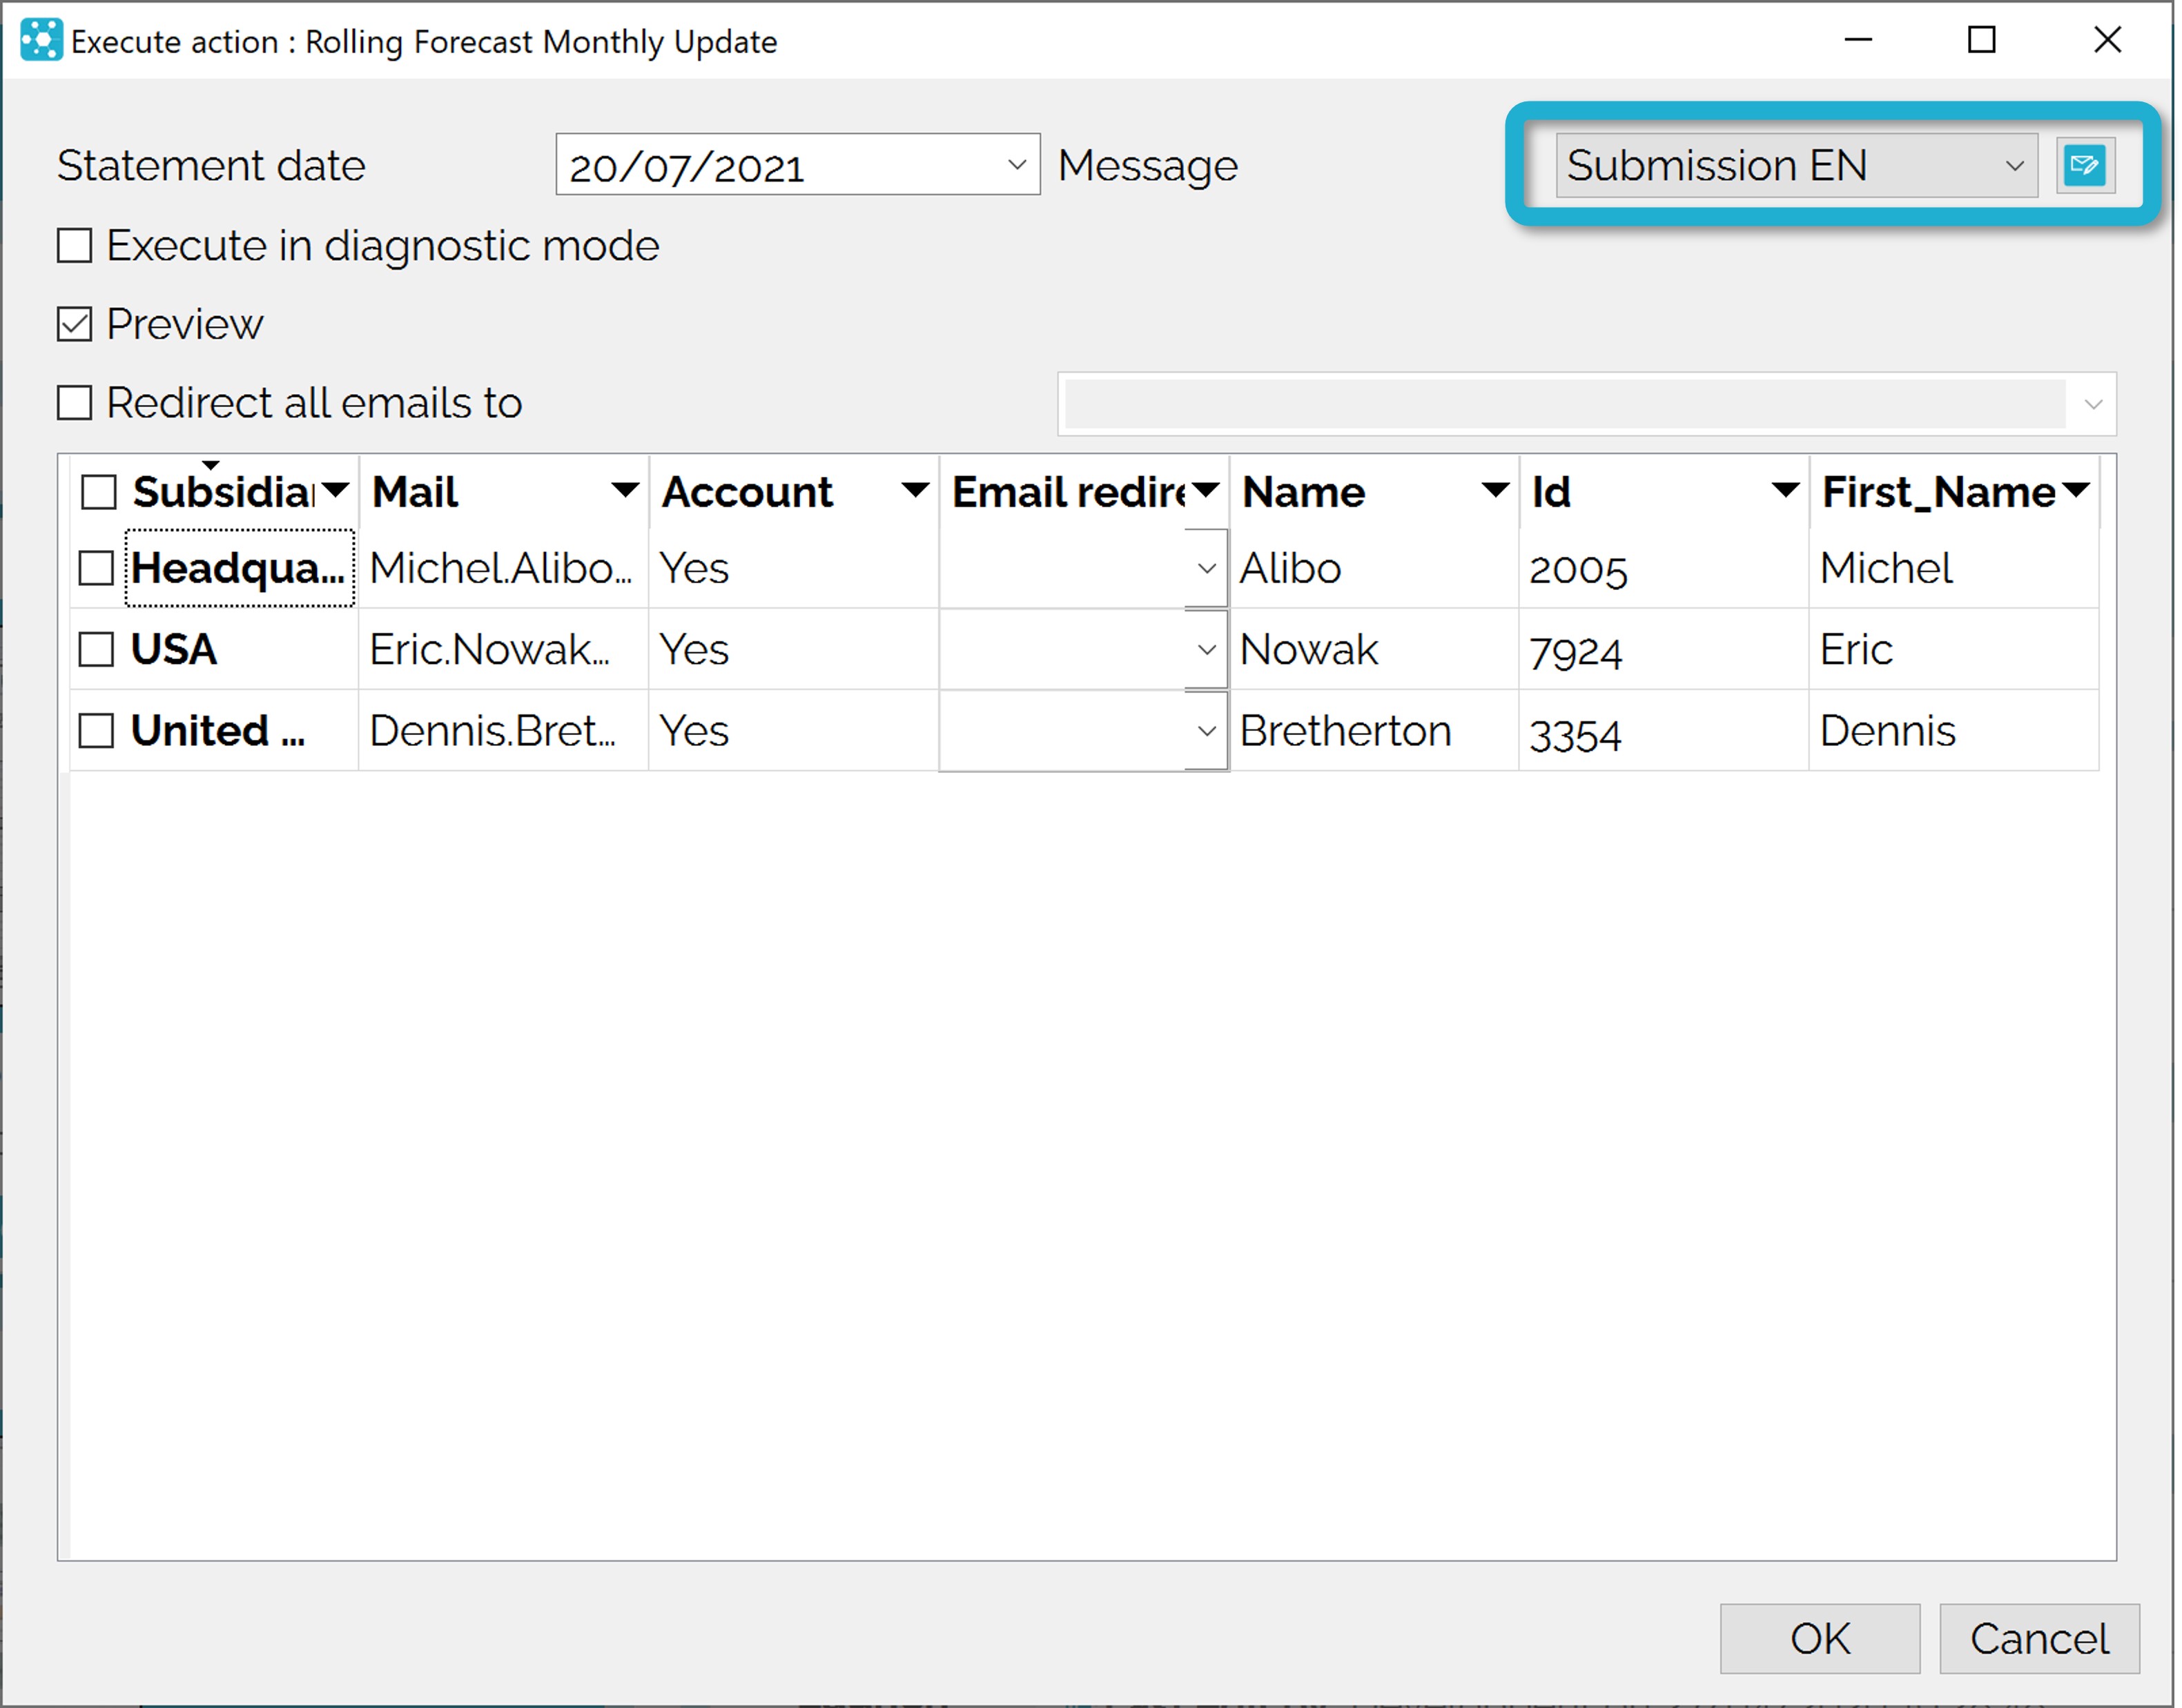
The message to be used at launch can be selected from the drop-down list in the upper part of the selection box for the entities to be addressed.
The button ![]() allows you to modify the message to access the “Edit message” window.
allows you to modify the message to access the “Edit message” window.
It is preferable to send a copy of the messages to the manager to monitor the launch and reception of the data.
Editing the message when relaunching.
Dunning is usually done manually from the responses page. Nevertheless, it is possible to prepare in advance reminder messages that will be sent automatically as part of the execution of a combined action, trigger or script using the API.
In the same way as for the launch, the request for a restart allows the message to be modified specifically for that run.
Using variables in messages
The same message is sent to several recipients; to personalize the messages, the manager can use variables or keywords (names between double brackets), allowing reference to elements/attributes specific to each recipient.
A keyword can be inserted in the message edit box by using the contextual menu (right-click) and choosing the keyword to insert.
The list of allowed variables can be modified by the project designer (technically, the fields must be present in the address book or the assignment relationship of the launch action).
In this way, by using the keywords in the CC field of the message, for example, the manager can then specify a different email copy address depending on the entity (for launch emails as well as 1st response emails, subsequent responses, reminders, etc.).
Using FOOTER in messages
Users who do not have an account will need additional information compared to authenticated users. This information can be displayed using the FOOTER.
The FOOTER is a section you can insert into GTServer messages that will only appear for users without an account.
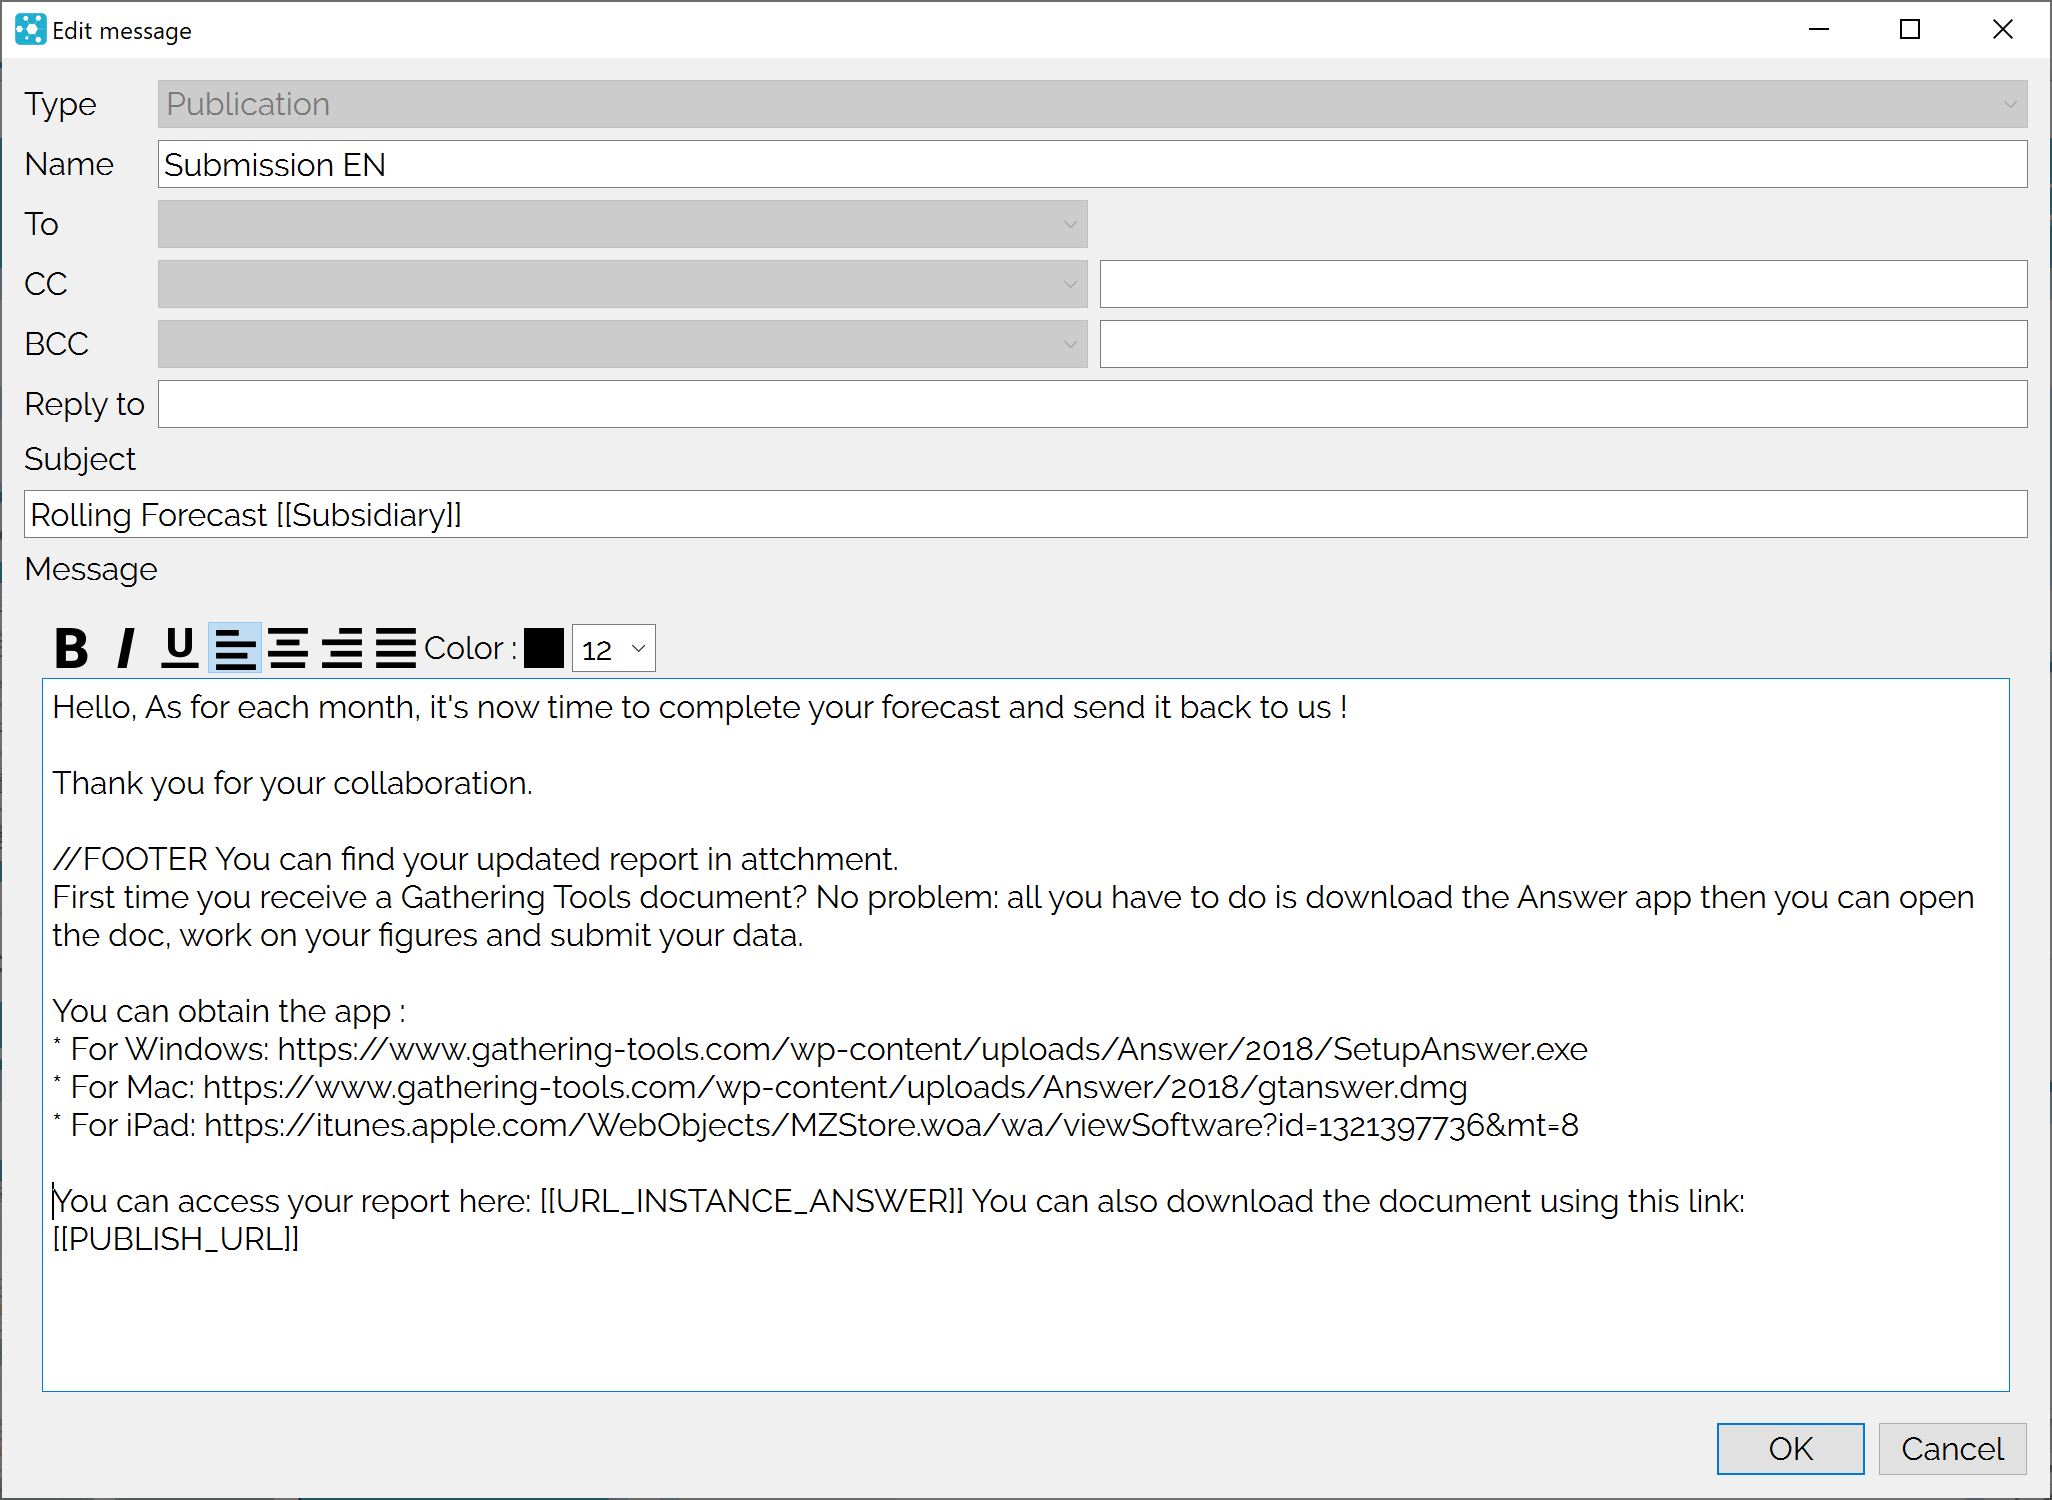
Using the FOOTER
- First of all, insert the link to download the GTAnswer application.
For the provision of documents (questionnaires and dashboards), there are 2 cases:
- If the GTWeb server is open to the public and users can connect to it, then you can use the publishing URL. This will provide users with a hyperlink to download the document.
- If the GTWeb server is not open to the public and users cannot connect to it, then do not insert the publishing URL. Thus, the document will be automatically added as an attachment to the email.
Launch the publication
On the templates page, select the template and click on the execution button.
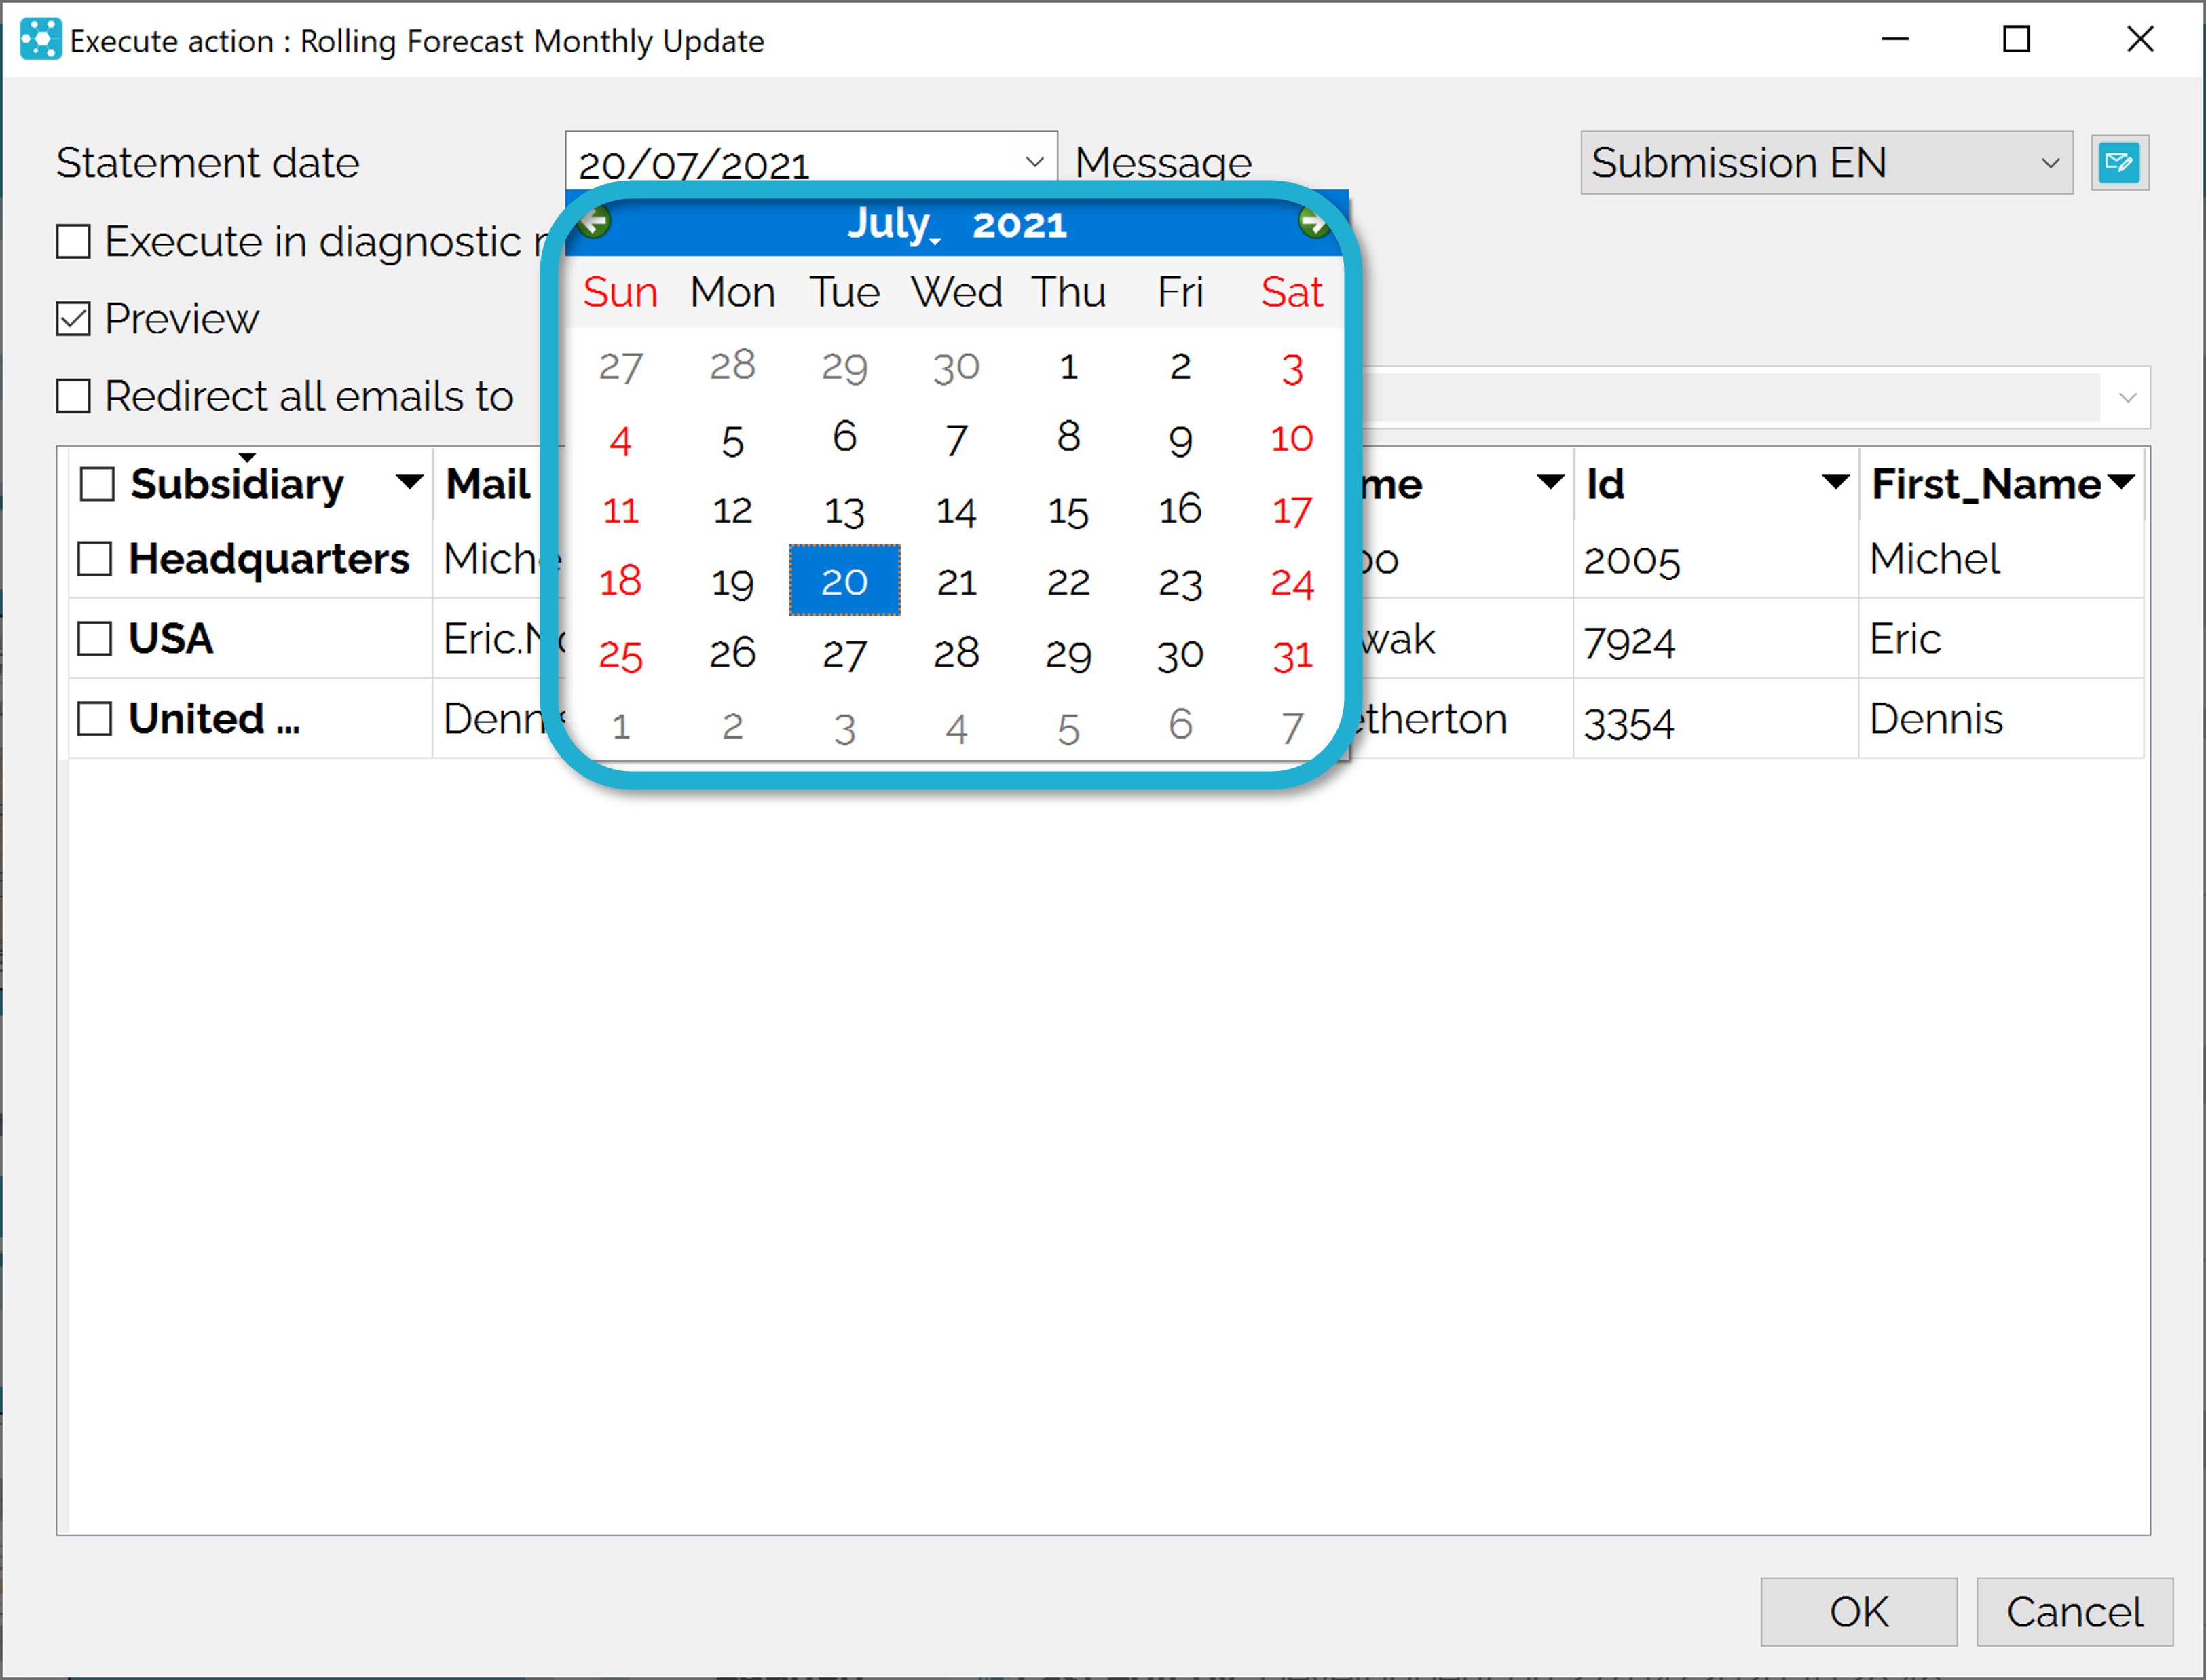
The entity selection dialog box appears:

The redirection address replaces the original address only for GTServer (i.e., for reminder messages, replies…) but not in the client database. If a message contains the keyword corresponding to the email path, it will be replaced by the original address. The developer must activate the email redirection in the action configuration.
Check that the statement date is correct.
Select “Preview” to view the documents before launching.
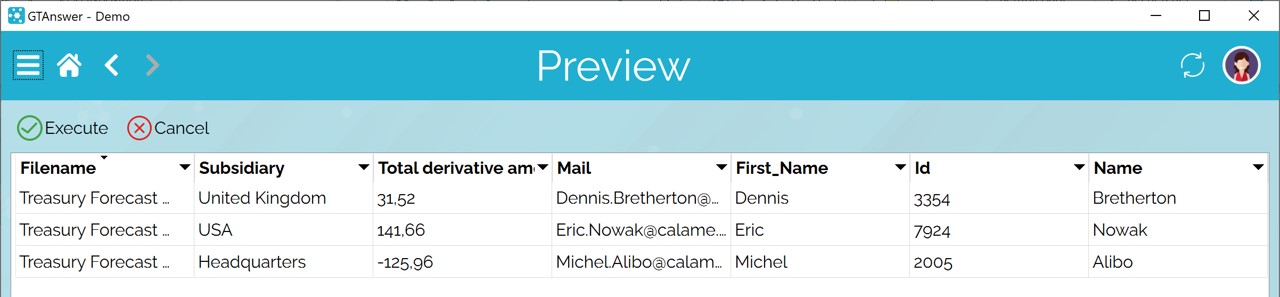
Once the generation of documents is complete, the preview box is displayed with the list of documents generated for each entity. By double-clicking on the documents, you can check them before launching.
Even when the application has reached cruising speed, it is strongly recommended to check a sample of the documents before launching.
If the documents are correctly pre-filled, validate the sending by clicking on the “Execute” button.
The execution of the action and the log of possible errors can be consulted in the History tab.
Successive publications
Documents may not be sent in a single pass.
In this case, a new execution of the launch action with verification of the prerequisites (correct end date and initial data) allows the selection of the entities and/or individuals to be addressed.
The documents sent will be included in the existing campaign for that model and statement date.
This “package” launch can be instrumental in the following situations:
- a questionnaire was sent with incorrect data
- a questionnaire has been sent to the wrong email address, or the actual correspondent has been changed.
It is important to know whether to close the whole campaign or only the questionnaires sent to the entity in both cases.
After closing or not closing the campaign or the corresponding questionnaires, new questionnaires can be sent to individuals for the selected entities by re-executing the launch action.
Note: It is not always necessary to launch new questionnaires to address correspondents who have changed. The simple transfer of the initial qstx file to the new correspondent allows the latter to replace the first one: the qstx is a file (such as an Excel workbook or a Word document) containing the answers already entered have been saved in this file.
However, if a new entity appears or you want the reminders to be sent to the new correspondent, a new execution of the campaign launch action for the entity and/or the recipients is necessary.